I recently transitioned from an MSI G75 Titan gaming laptop (equipped with Core i9 and 1080 GTX) to an ROG Strix Scar 17, boasting a Ryzen 9 with a 3080 RTX. While the Titan remains powerful, especially after enhancing it with 6TBs of SSD and 64GB RAM, I opted to transform it into a dual-boot system, combining Windows for gaming and Linux for productivity.
Here’s a step-by-step guide to my experience, the challenges I encountered, and how I resolved the persistent BitLocker recovery screen problem when switching between the operating systems.
Setting Up the Dual-Boot System:
I retained the existing Windows OS on the Titan.
I installed Linux on another SSD, with Grub as the default bootloader.
To avoid potential complications, I disabled BitLocker on Windows prior to the Linux installation and re-enabled it afterward.
Encountering the BitLocker Challenge:
Upon launching Windows after installing Linux, I was confronted by the BitLocker recovery screen. Various attempts to rectify this, from disabling secure boot to adjusting SSD boot priorities, proved futile.
Exploring Solutions Online:
Online tech communities offered a plethora of potential fixes. One widely acknowledged solution recommended suspending BitLocker management on Windows. While it worked temporarily, it was a short-lived success.
The Workaround:
An accidental discovery led to a temporary fix: bypassing Grub by pressing the Escape key and typing “exit”, which would then activate the Windows bootloader. Though effective, it was hardly an efficient long-term solution.
The Permanent Fix: Modifying Grub Config
Install Grub Customizer from Ubuntu Software.
Open it and select the Windows entry and select the Modify option.
Simply enter exit 0 above the rest of the code.
At this point you can also do some housekeeping. I changed the needlessly long title to just “Windows” and I moved it to just below “Ubuntu”, above the debugging options. You may want to refactor out the pointless conditonal as well but I didn’t bother as this code will no longer be executed anyway.
Hit save.
exit 0

insmod part_gpt
insmod fat
if [ x$feature_platform_search_hint = xy ]; then
  search --no-floppy --fs-uuid --set=root 20CE-363B
else
  search --no-floppy --fs-uuid --set=root 20CE-363B
fi
chainloader /efi/Microsoft/Boot/bootmgfw.efi
As an aside, I have no idea why there’s a conditional in here that just ends up running the exact same code in either case. It doesn’t inspire a whole lot of confidence in the rest of the code but I digress.
Anyway, after these steps, switching to Windows from Grub should consistently boot without the BitLocker recovery screen popping up.
Sony released the original PSP back in 2005. It was promoted as a portable PS2 but although it was impressively powerful for the time, as was standard practice back then, Sony was talking bollocks and in reality its power lay somewhere between that and a PS1.
Its games came on a Universal Media Disc or UMD. This was a 1.8GB disc encased in a plastic housing that was designed to protect the media from scratches.
UMDs were chosen over cartridges because of their capacity and, more importantly, their cost-per-GB. To compare, cartridges for Nintendo’s DS ranged between 8 and 512MB in capacity – with most games using either 64MB or 128MB.
In truth though, the format sucked. The PSP’s drives were painfully slow, clunky and overly fragile for a console that was meant to be portable. And thanks to the mechanical aspect of the drive, it also impacted on the battery performance of the console.
Sony released two more iterations of this design which improved the performance and specification of the console, but they were all hamstrung by the UMD drive.
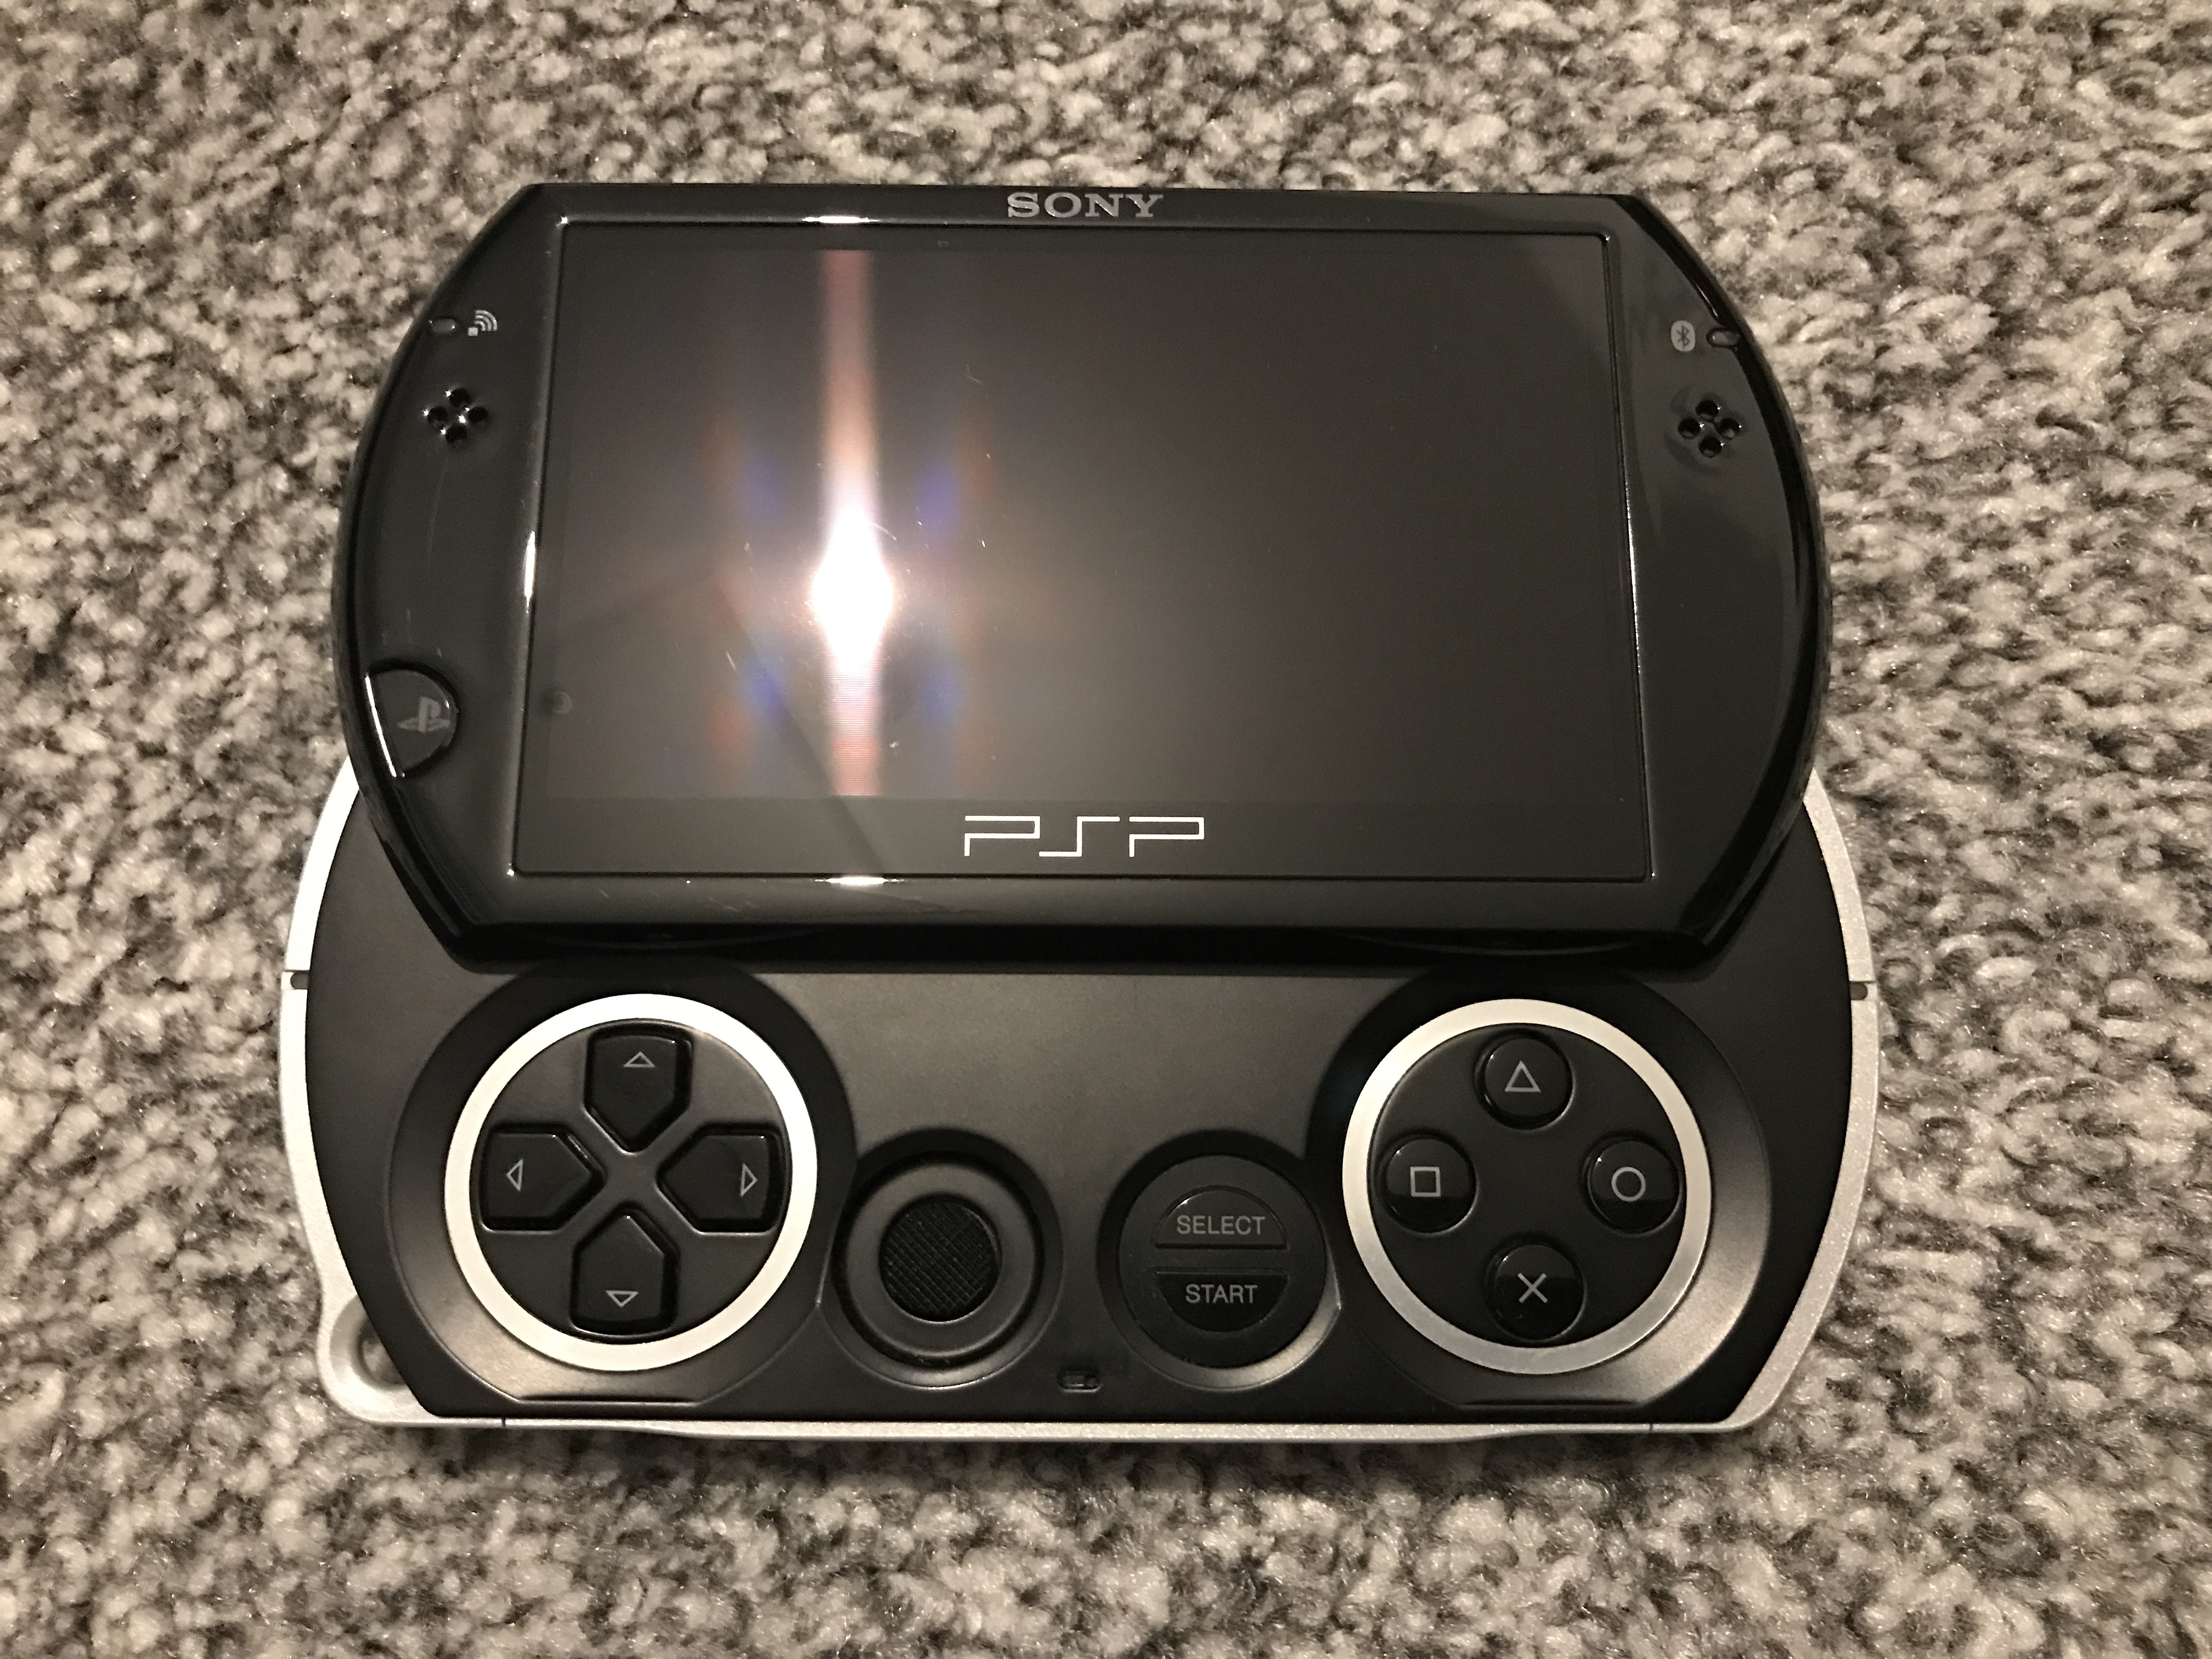
In 2009, Sony released the PSP Go. This model removed the UMD drive and the idea was that users would get their games from the online store instead. The removal of the drive meant that the console could be much smaller and lighter than all the other iterations, with better battery life.
Where Sony gave with one hand though, it took away with the other. The memory format was changed from the Pro Duo of the earlier models to another proprietary format called M2, which was much smaller – about the same size as Micro SD. This decision would be significant for the model’s future.
After releasing a console that could only get its games from the online store, Sony seemed determined to make it as difficult and as unpalatable as possible for people to actually go ahead and make use of it:
The digital versions of games were more expensive than their physical counterparts. They would also remain full price for months if not years after release, while physical copies would get discounts just weeks later.
Since digital seemed to be an afterthought as far as the PSP was concerned, the vast majority of the PSP’s game library was not available for digital purchase due to licensing issues.
The M2 memory cards required to store these downloaded games were stupidly expensive compared to alternatives like Micro SD, and while Micro SD capacities continued to increase, the largest M2 that was ever released was just 16GB. This meant users with large collections of digital games would either need to purchase multiple cards – each stupidly expensive – and swap between them as required, or just have the one card with a small selection of games carefully chosen from their online library.
Although Sony had previously suggested PSP owners with existing UMD collections may be able to trade these in for digital versions at “participating stores”, this idea never came to pass. So regardless of the size of a user’s UMD collection from earlier PSP models, it was actually impossible for Go owners to play those games on the Go without re-purchasing them digitally – for inflated prices – and that was only if they were even available for purchase.
It’s little wonder then that commercially, the Go was a failure.
The hacking scene however turned the Go into a pretty reasonable device, since custom firmware allowed it to run games that the user could either dump themselves using a UMD-based console, or take advantage of someone else’s efforts and download them for free from the internet.
Suddenly the Go wasn’t limited to the anaemic selection of games that Sony had made available on its store, and it could play every game that had been released physically. This really made up for Sony’s poor efforts.
This development benefitted the other PSPs too, since they no longer had to use their slow, clunky and battery-sapping UMD drives to play games but instead could run them all from memory card. However, while those consoles enjoyed ever-expanding Pro Duo capacities, the Go languished on 16GB (or 32GB including the internal memory) and this was because the Go’s lack of sales convinced them not to bother releasing any larger capacities.
The older PSPs have even able to enjoy the much larger capacities of modern Micro SD cards thanks to Pro Duo/Micro SD card adaptors. But since M2 is about the same size as Micro SD, it has not been possible to create an adaptor for those.
The PSP Go is actually my favourite form factor as it fits very comfortably in even the smallest of pockets, and since the screen is a little smaller than it is on the others it also looks a little sharper. It can also be played on a large TV thanks to TV-out and Bluetooth support that allows it to be paired with a controller. For years though, the problem with the Go has been its terribly small memory limitations. But not any more!
Breaking free from M2
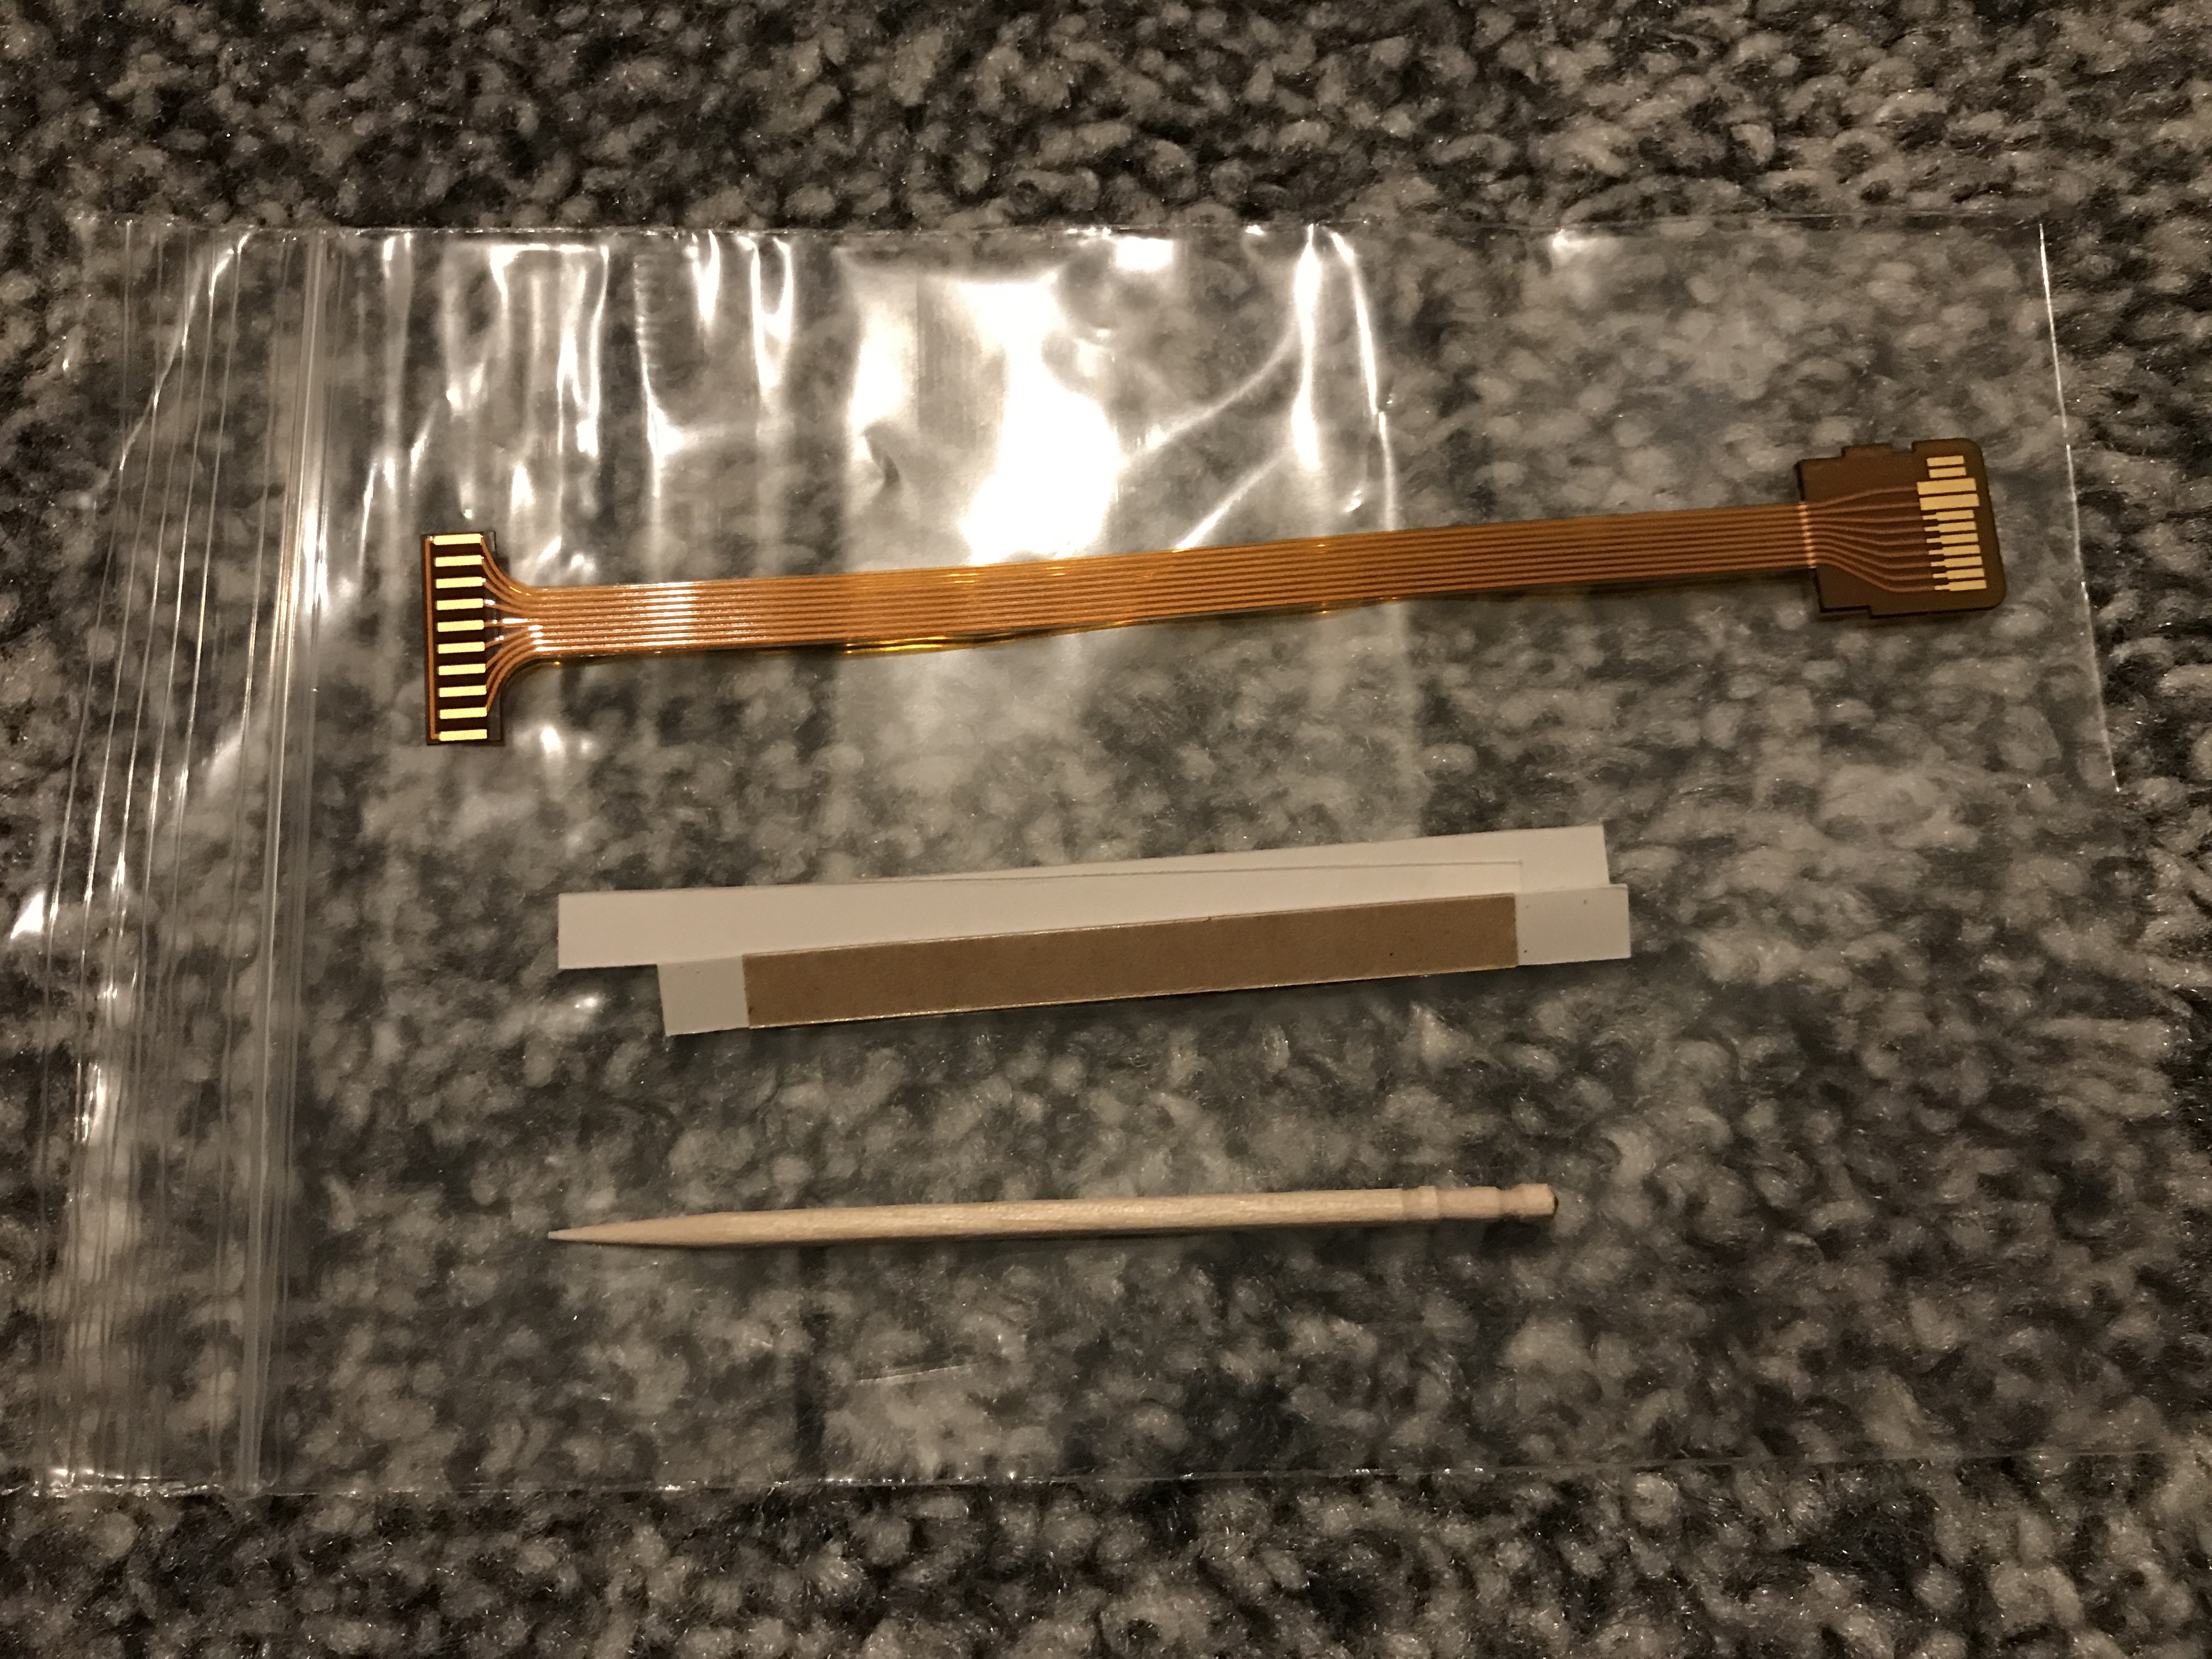
I recently purchased this ribbon cable from a seller in Japan. It allows the use of a Pro Duo/Micro SD adaptor by running a cable from an internally-stored adaptor to the M2 port.
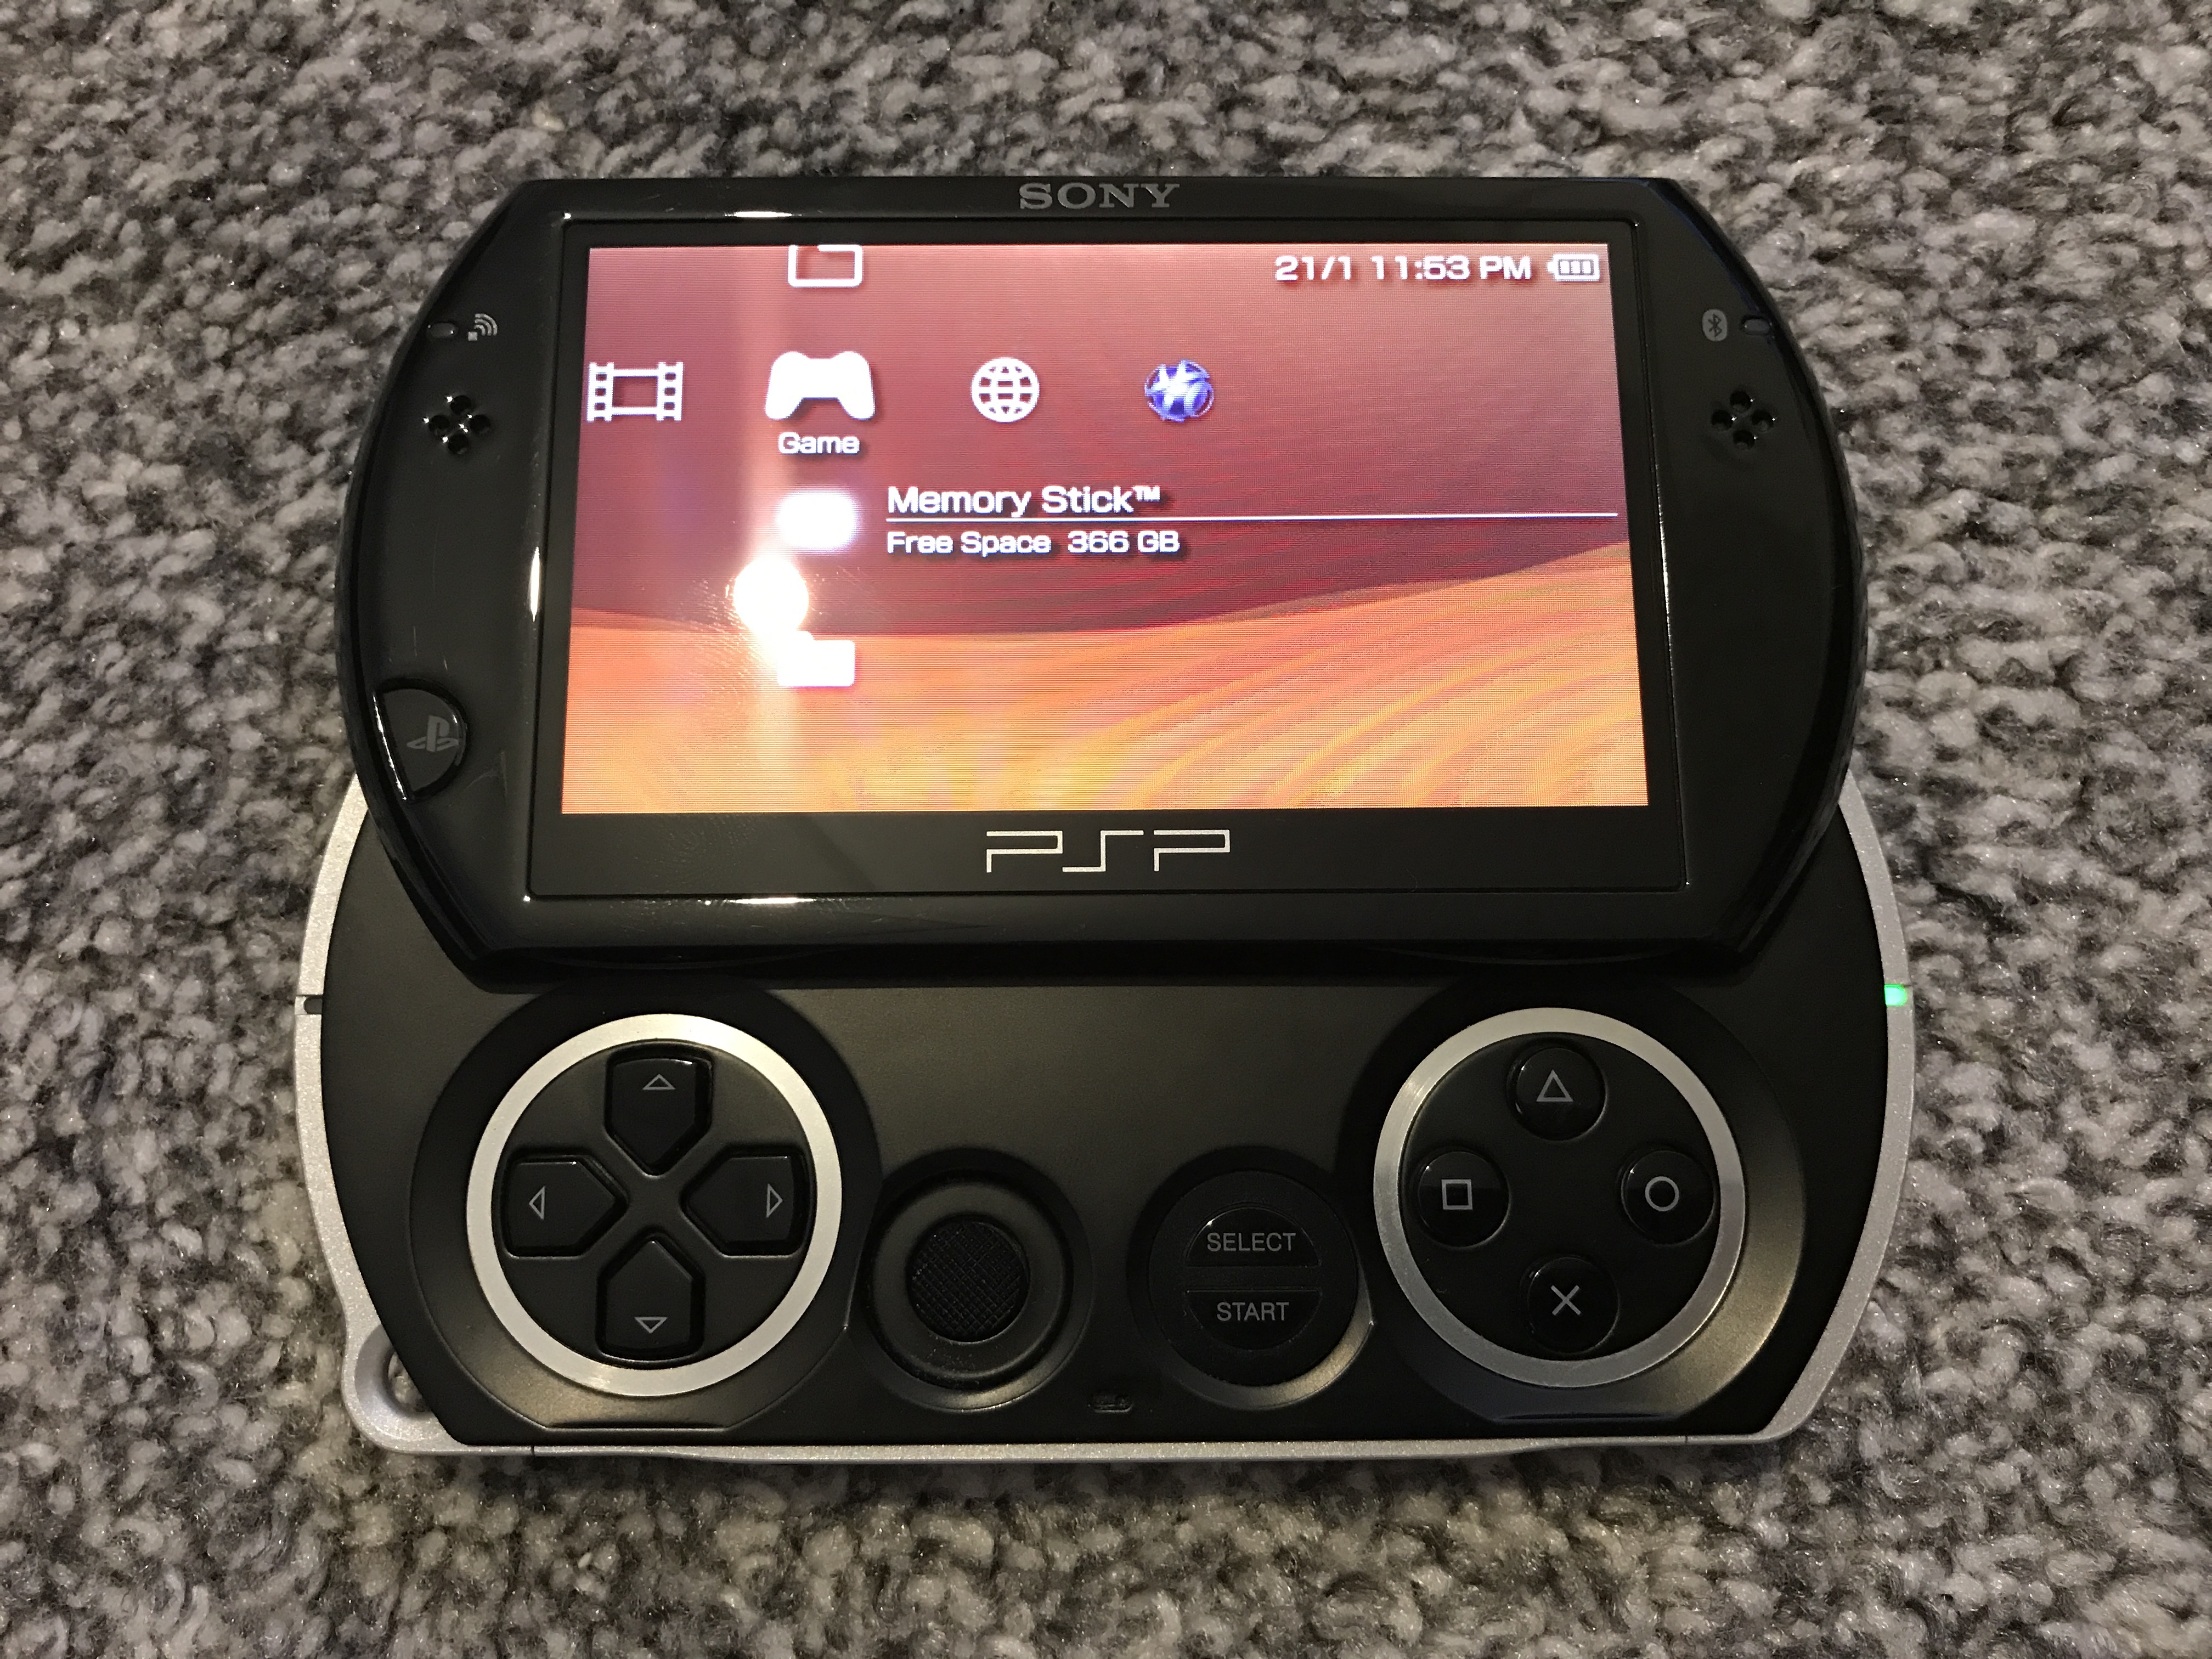
It took about a week to arrive. I’ve just installed it and am pleased to report that my Go now has access to the 16GB internal memory in addition to… a 400GB Micro SD card! So I now have the most portable iteration of the PSP with almost half a terabyte of storage space – and it can even be upgraded with a larger Micro SD card in future as capacities continue to increase!
Similar mods have been available in the past but those have required irreversible modifications to the device, which I was never keen to do. This modification however is completely reversible as it has caused zero harm to the console.
My next problem is deciding on how to fill that card!
In general, I’m a fan of Nintendo: their hardware possesses a playfulness that is absent in their competitors and their games are almost always polished to within an inch of their life.
But Nintendo does seem to make a lot of really stupid mistakes with their hardware: mistakes that often make me wonder what their product designers – not to mention QA teams – are smoking sometimes.
I’m not talking about cosmetic preferences here – purple consoles aren’t to everyone’s taste but that doesn’t constitute a design flaw. Nor am I talking about the incompatibilities between the not-so-hidden agenda of decision makers and the needs of the customer – like proprietary connectors or memory cards – because although these things are annoying, they’re still deliberate if disagreeable decisions and not stupid oversights.
What I’m talking about here are instances where the entire product development process has failed to such a degree that hardware is released with glaring deficiencies that affects the core functionality of said product.
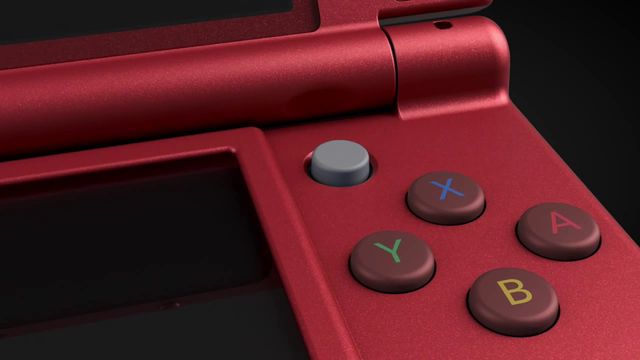
Nintendo 3DS
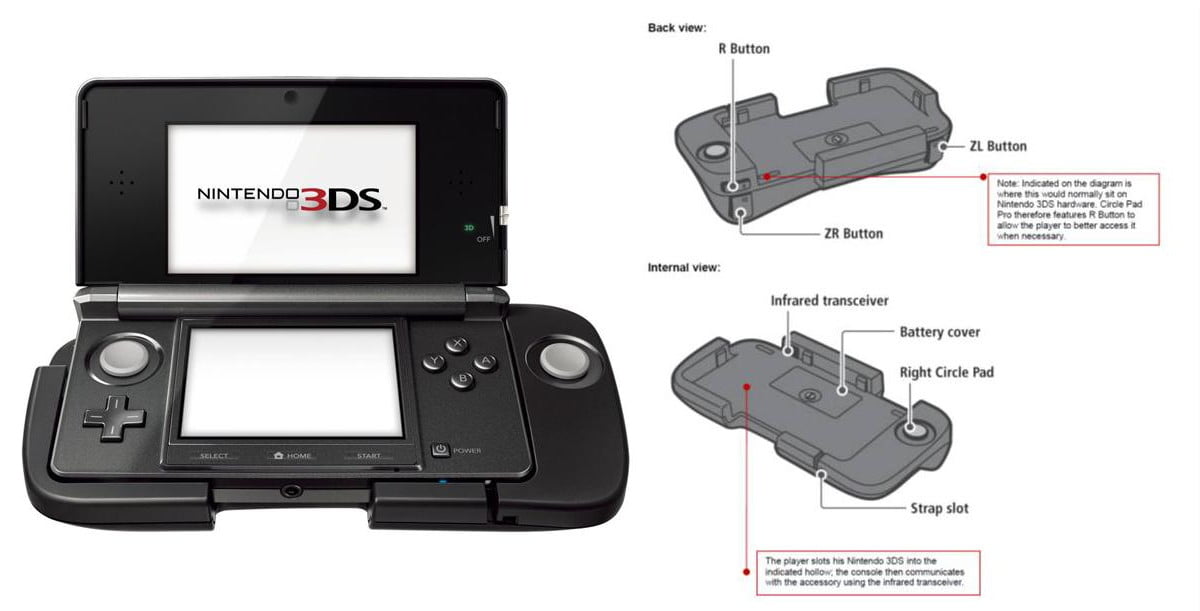
The Nintendo 3DS brought spectacles-free 3D to the masses. But across its many iterations it also contained three significantly stupid design flaws.
Firstly, it only came with a single analogue stick. The release of the hideous 2nd analogue stick add-on accessory mere months later confirms that this was a stupid design flaw.
Later revisions of the console had a 2nd stick built-in, though for some reason it was a tiny nipple-like nub and not the true 2nd analogue stick that everyone was expecting and hoping for. Perhaps Nintendo felt that not calling it a 2nd analogue stick somehow excused them for not including it in the original release of the console?
Secondly, in the case of the “new” (read: redesigned) 3DS consoles, the user had to use a screwdriver to remove a cover in order to replace the micro SD card. Although it’s unlikely that a user was going to need to replace this card too often, they most probably wanted to replace the card at least once with a higher capacity example given that the console shipped with just 8GB. Needing a screwdriver to achieve this when I think every other device of this kind in the world allows access without such a tool (as did the original 3DS as well as the later 2DS XL) is just ridiculous.
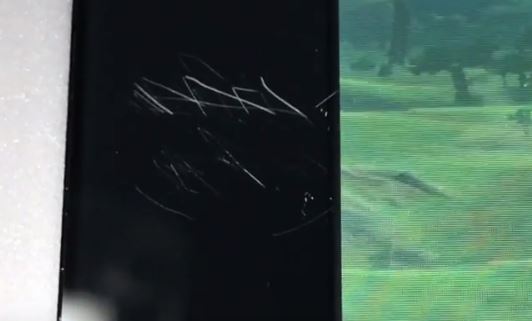
But a far more serious design flaw that came with the original iteration of the console – one that wasn’t limited to hampering gameplay or causing an inconvenience but actually physically damaging the console through no fault of the owner – was the design of the clamshell.
Closing the screens – as you would do when not using the console – would slowly accumilate scratches on the top screen because it actually came into contact with the bottom half of the console. Later revisions would add little rubber spacers to prevent this from happening, but not before many owners of the original console got to ruin their machines just from using it the way they were supposed to. How was this issue not picked up during development?
Nintendo Switch
Nintendo clearly didn’t learn from their mistakes with the 3DS though, because the screen on the 3DS’s successor, the Switch, is also damaged when using the console as intended.
The Nintendo Switch is a handheld console that comes with a dock that allows the user to quickly and easily connect the console to their TV. This mechanism allows the gamer to enjoy their games both on the big screen and while on the move.
But sliding the Switch in and out of its dock causes scratches on the console’s screen where the (plastic) screen cover meets the (also plastic) guides of the dock.
Had Nintendo spent a little more and used toughened glass screen covers or alternatively softer (maybe velvet-covered?) guides, then this would not have been an issue. As it was, users were left to come up with their own solutions which often consisted of toughened glass screen overlays, filing down the guides, gluing home-made velvet covers over them, a combination of all three or simply purchasing a third-party dock (and hope it didn’t brick the console).
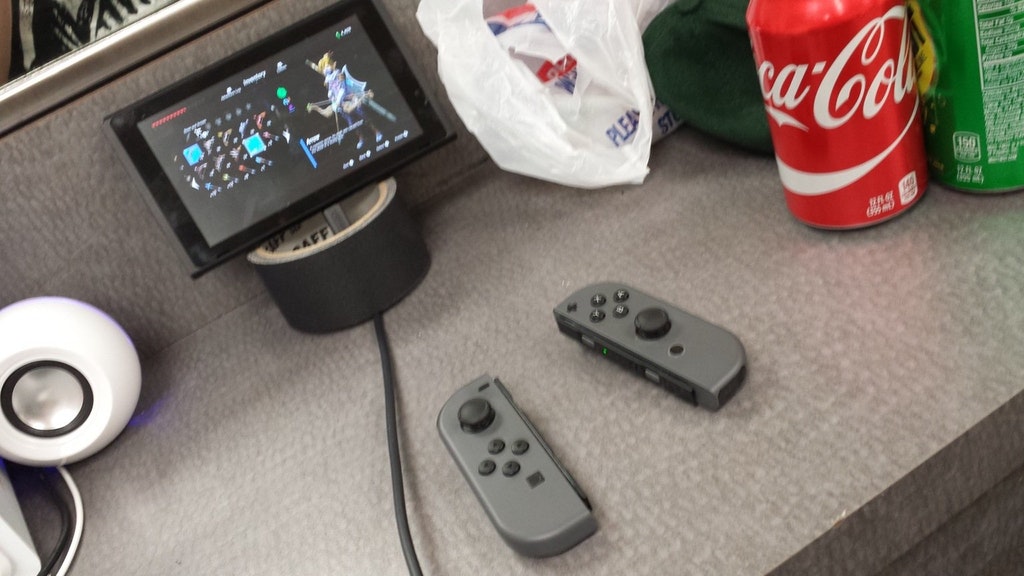
Then there’s the joycons – the Switch’s controllers. For the first few months after release, it was obvious from the many forum posts and news stories that these weren’t quite right either, with many of them failing to register input on the device. Nintendo issued statements suggesting that users must be sitting too far away from their console or that their wifi was causing interference, but there are many videos online of users demonstrating the issue while holding the controllers literally inches away from the console. Bear in mind that this is something that is supposed to work from at least the distance between the sofa and the TV. Nintendo later claimed to have fixed the issue with a firmware update (so it wasn’t wifi interference then?) although many users still complained about the issue.
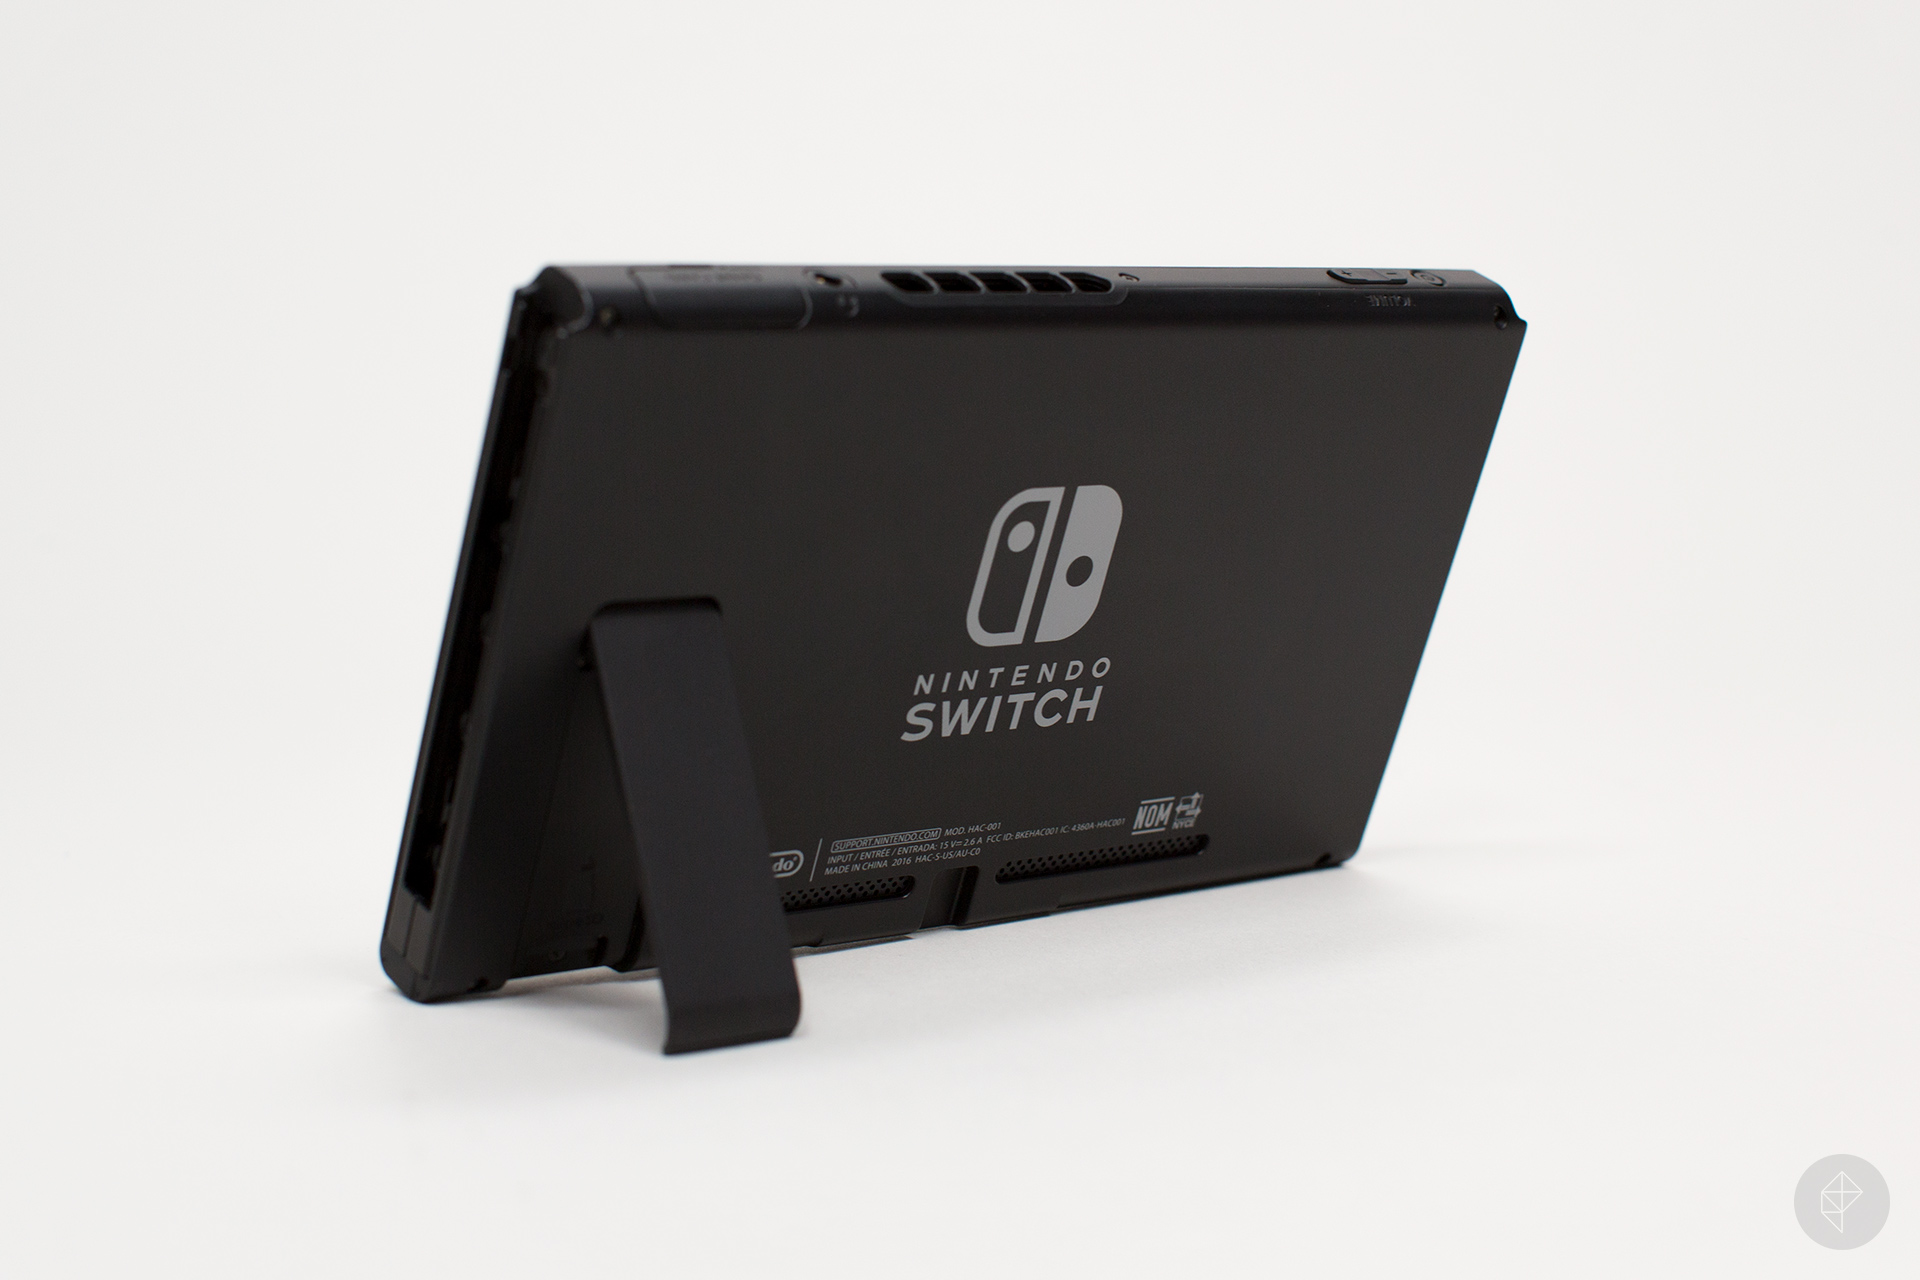
Then there’s the kickstand. This is a flap at the back of the console that when extended props up the console so that it can be played while resting on a flat surface. Nintendo calls this “tabletop mode”. The kickstand is very thin, very flimsy, and placed so far over to one side of the console that the lightest of taps with your finger on the opposite side is enough to topple it over. This kickstand should obviously have been made from sturdier material and should have been placed more centrally.
While we’re on the subject of “tabletop mode”, while you’re using the console like this, it’s actually impossible to charge the device because the charge socket sits on the bottom edge of the console – the edge that is now in direct contact with the table.
So you either have to quit playing after a short time to charge up your console or prop it up on the table using a 3rd party stand – or if you don’t want to fork out for one of these, some home-made solution.
Nintendo finally released their own charging stand on the 13th of July 2018 – a whole 15 months after the console was launched. But the charge socket should obviously have been placed elsewhere.
Usability testing? What’s that?
It’s my opinion that Nintendo makes more than enough money to put their products through some decent usability testing before launch. Have people actually use their products for a month or two and then provode feedback on their day-to-day experiences with the hardware.
I think this would help them to release products that aren’t fundamentally broken in terms of their design and that can only be a good thing both for Nintendo and for their customers.
Having recently secured a dedicated games room after moving house, I’ve been slowly working my way through each retro console and making it the best that it can be before adding it to my custom-made TV cabinet. First on the list was the Sega Dreamcast.
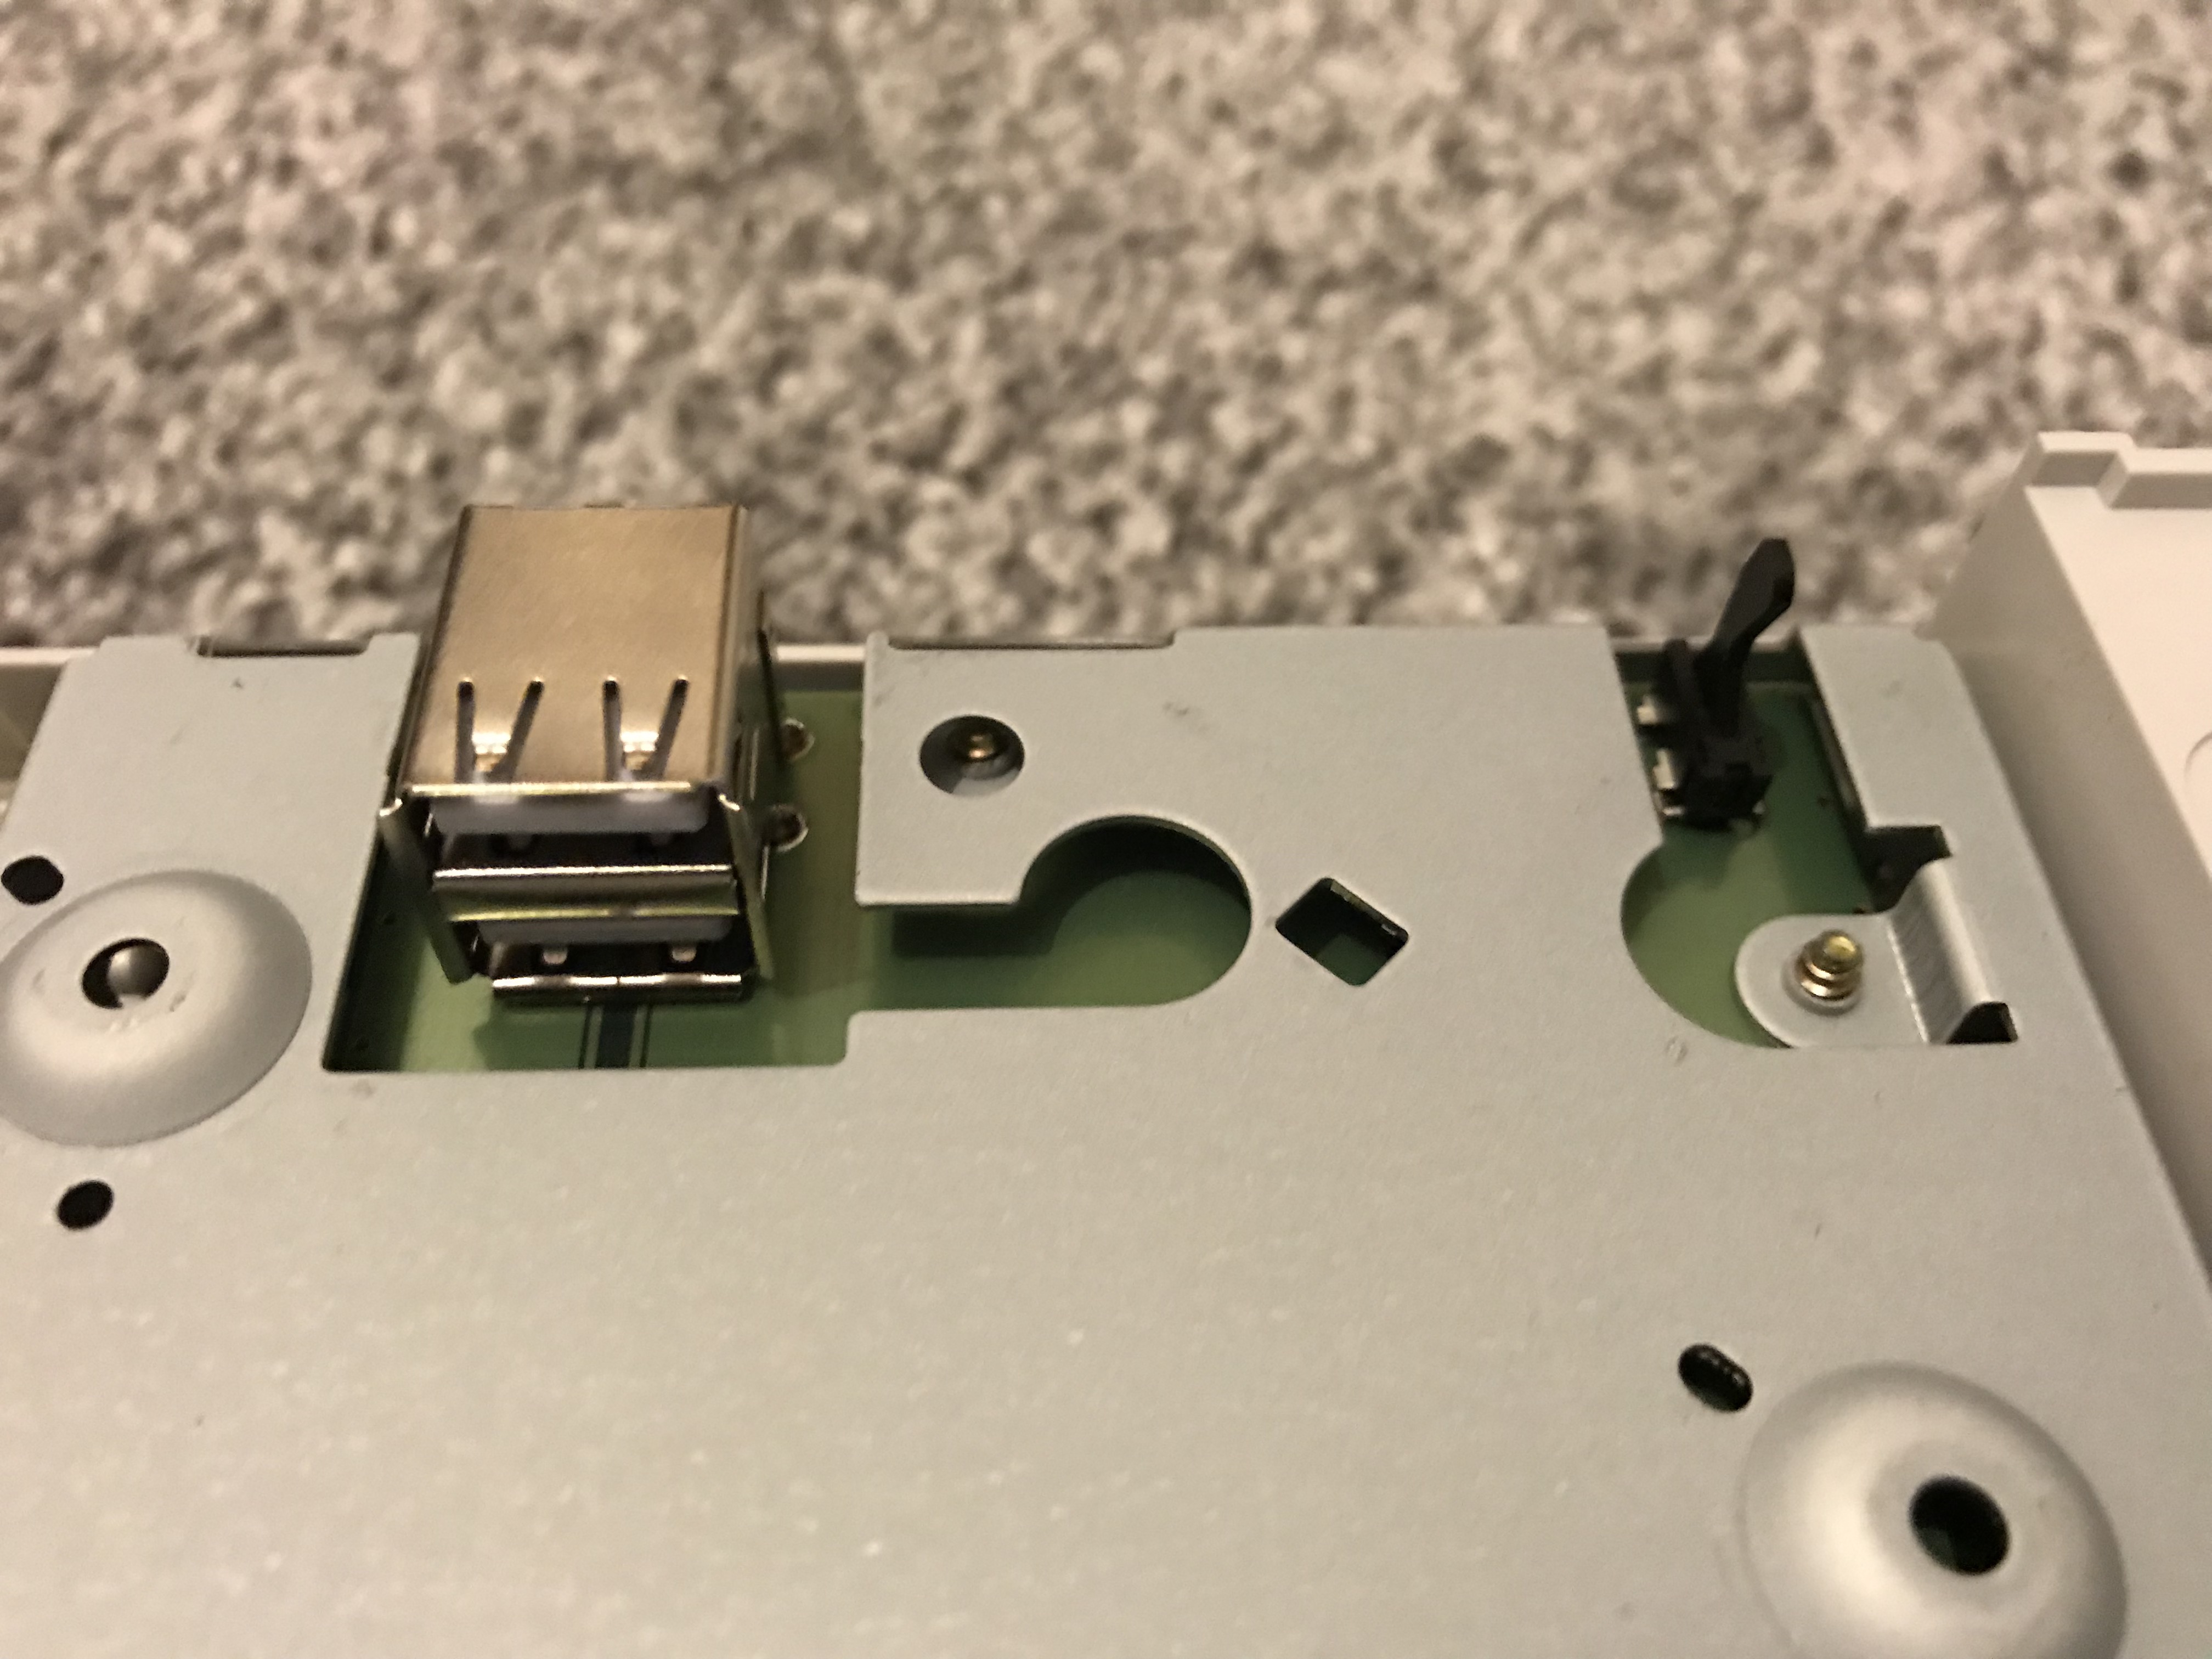
The first thing to do was replace the optical drive (inherently one of the parts most prone to failure on retro hardware) with a USB GD-ROM. This board physically replaces the drive with a USB port allowing the user to run their games from USB stick. Games load faster, the console is more reliable (and a lot quieter!), and depending on the size of the USB stick, the owner need never get up from the sofa again when switching games!
When researching this component I come across a fair amount of negative feedback on “Mnemo”, the guy who makes them, including the notice on this page (since removed so check out this page instead).
By all accounts, the guy seems to be a bit of an arsehole challenge to work with. Nevertheless, the USB GD-ROM is a great piece of kit, he seems to be the only person on this earth who makes them and they hardly ever seem to come up for sale second hand, so if I wanted one I was going to have to buy direct from this guy.
Thankfully I found feedback from many users who had done just that and they had all received their units as promised so I took the plunge. And I’m pleased to report that a few weeks later, it arrived!
For a lot of people, this is as far as Dreamcast modding goes. But I didn’t like the fact that the board was visible through the hole inside the drive bay where the optical drive had once sat, so I ordered a 3D-printed plate that hides everything very neatly.
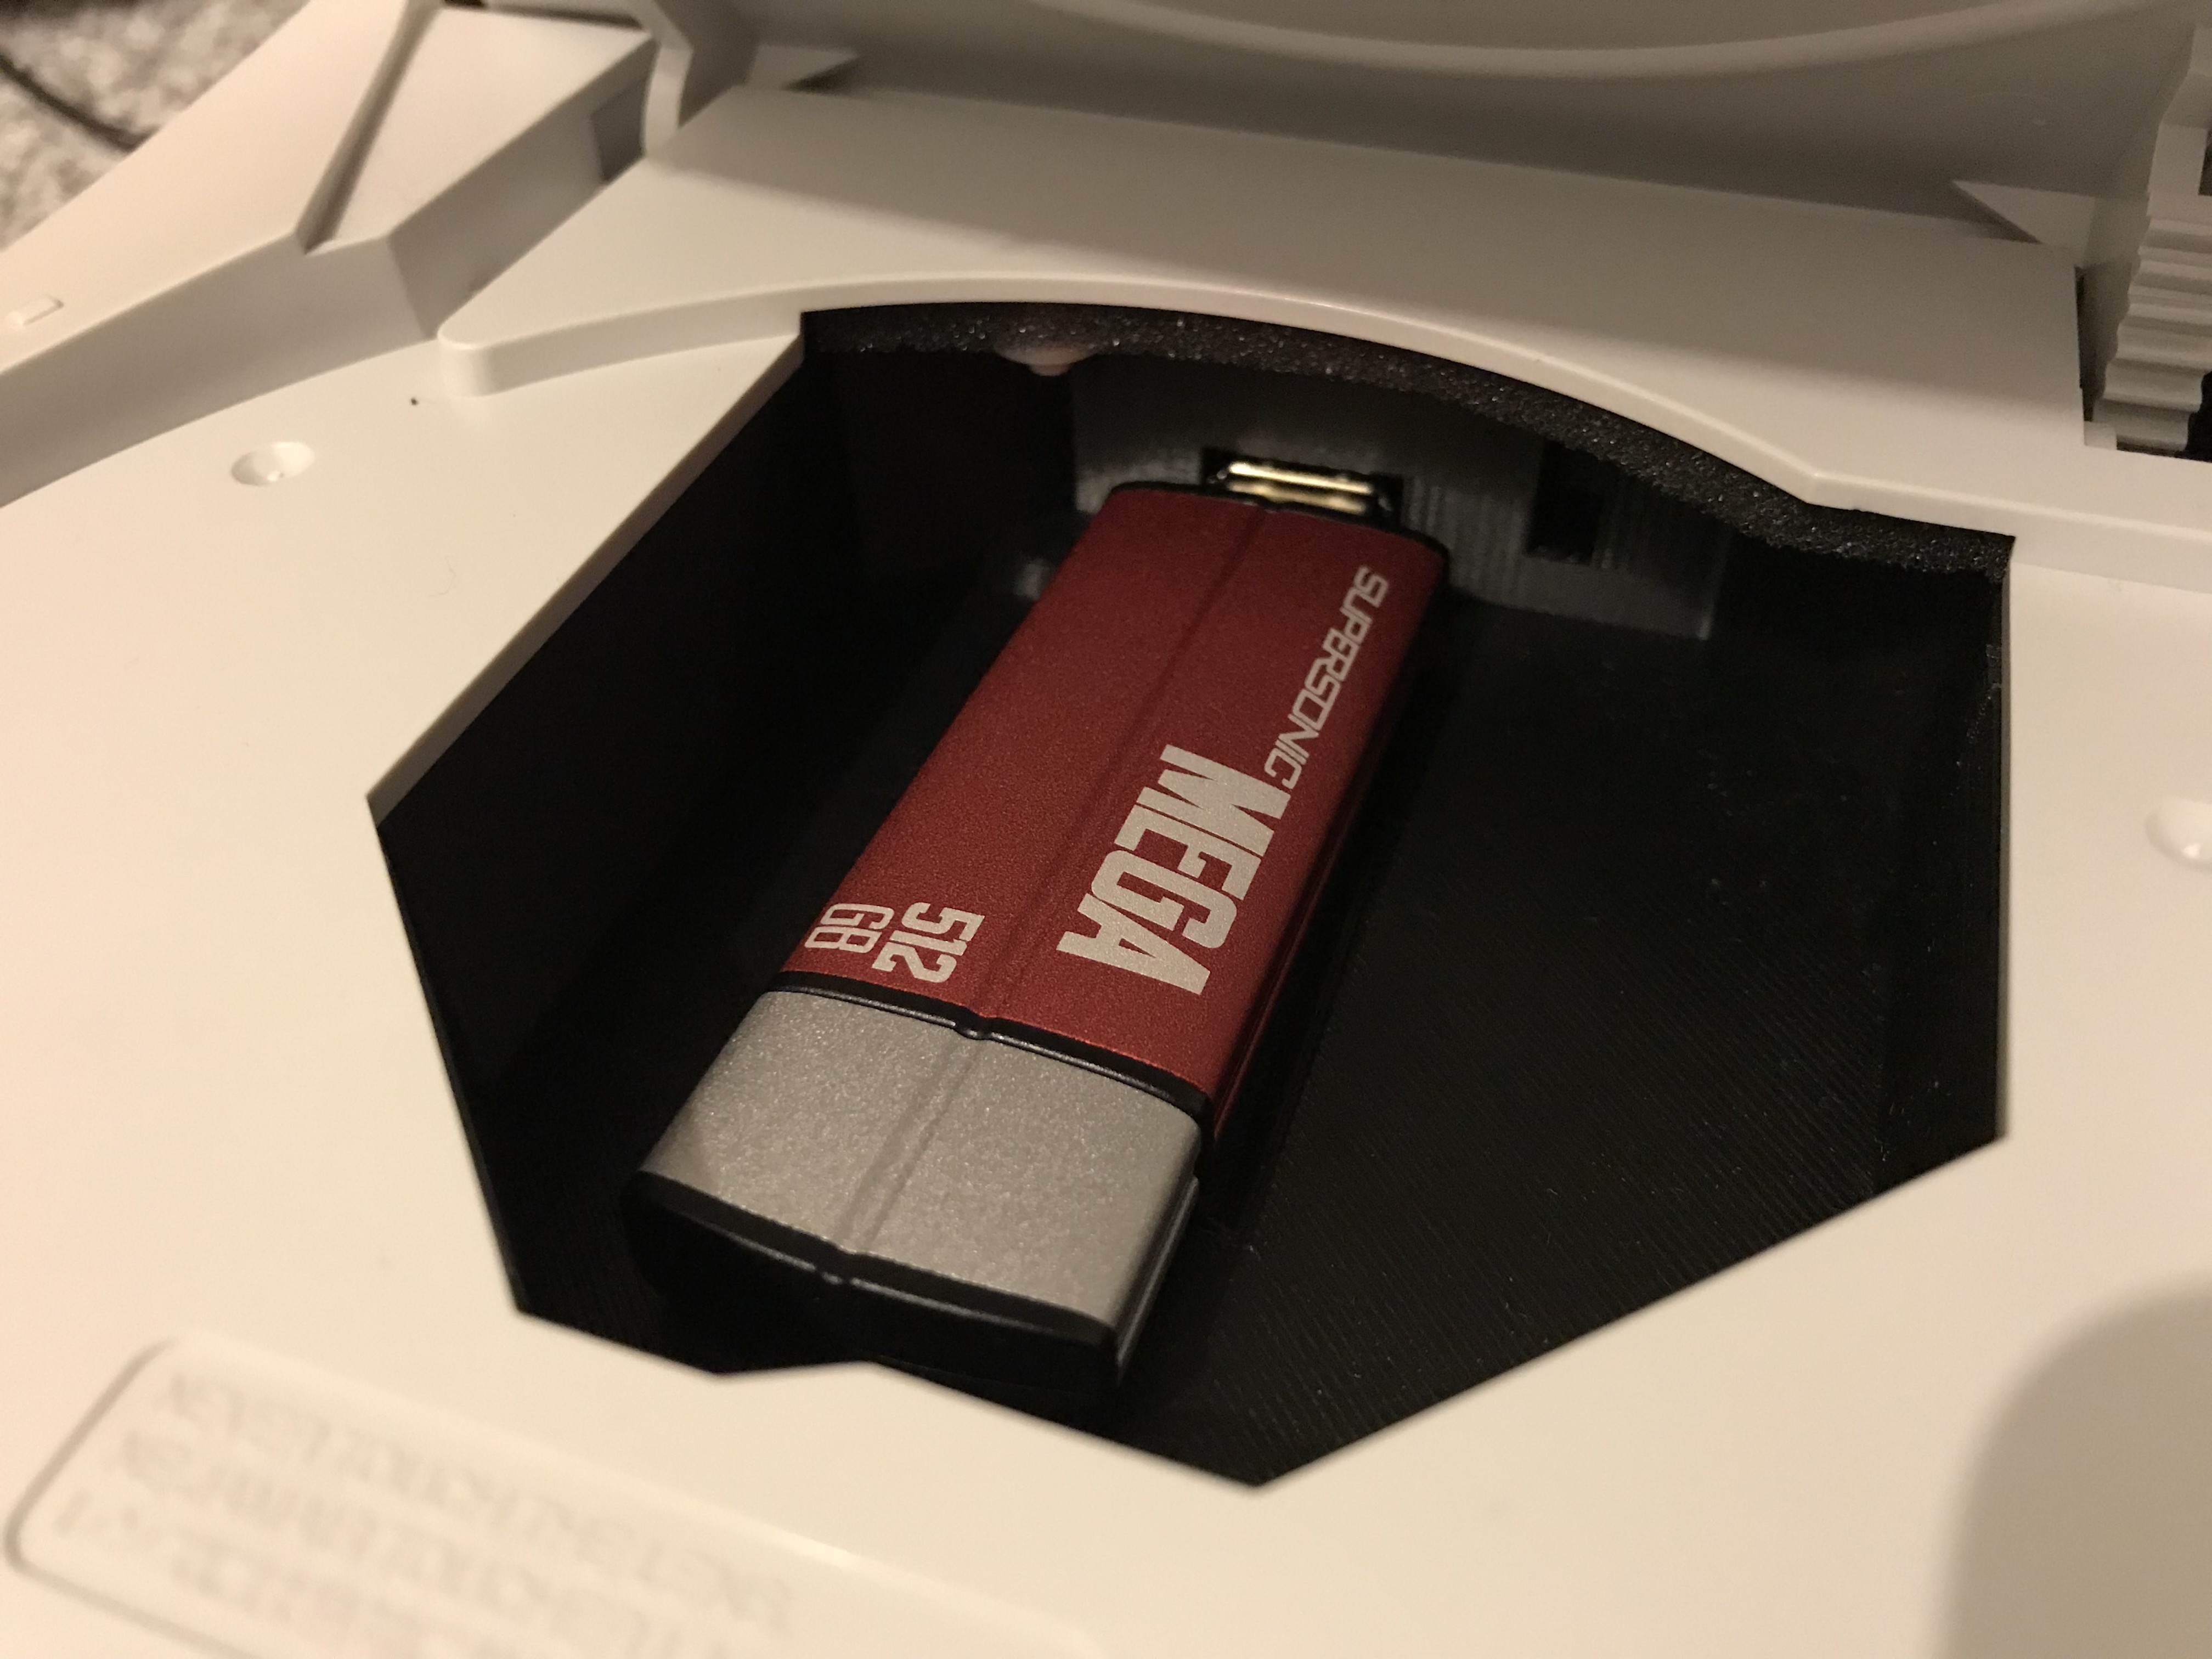
A Patriot 512GB Supersonic Mega USB 3.0 drive completed the mod, allowing for the majority of the Dreamcast library – and certainly every 70%-and-over game – to be accessible without ever having to open the drive bay again.
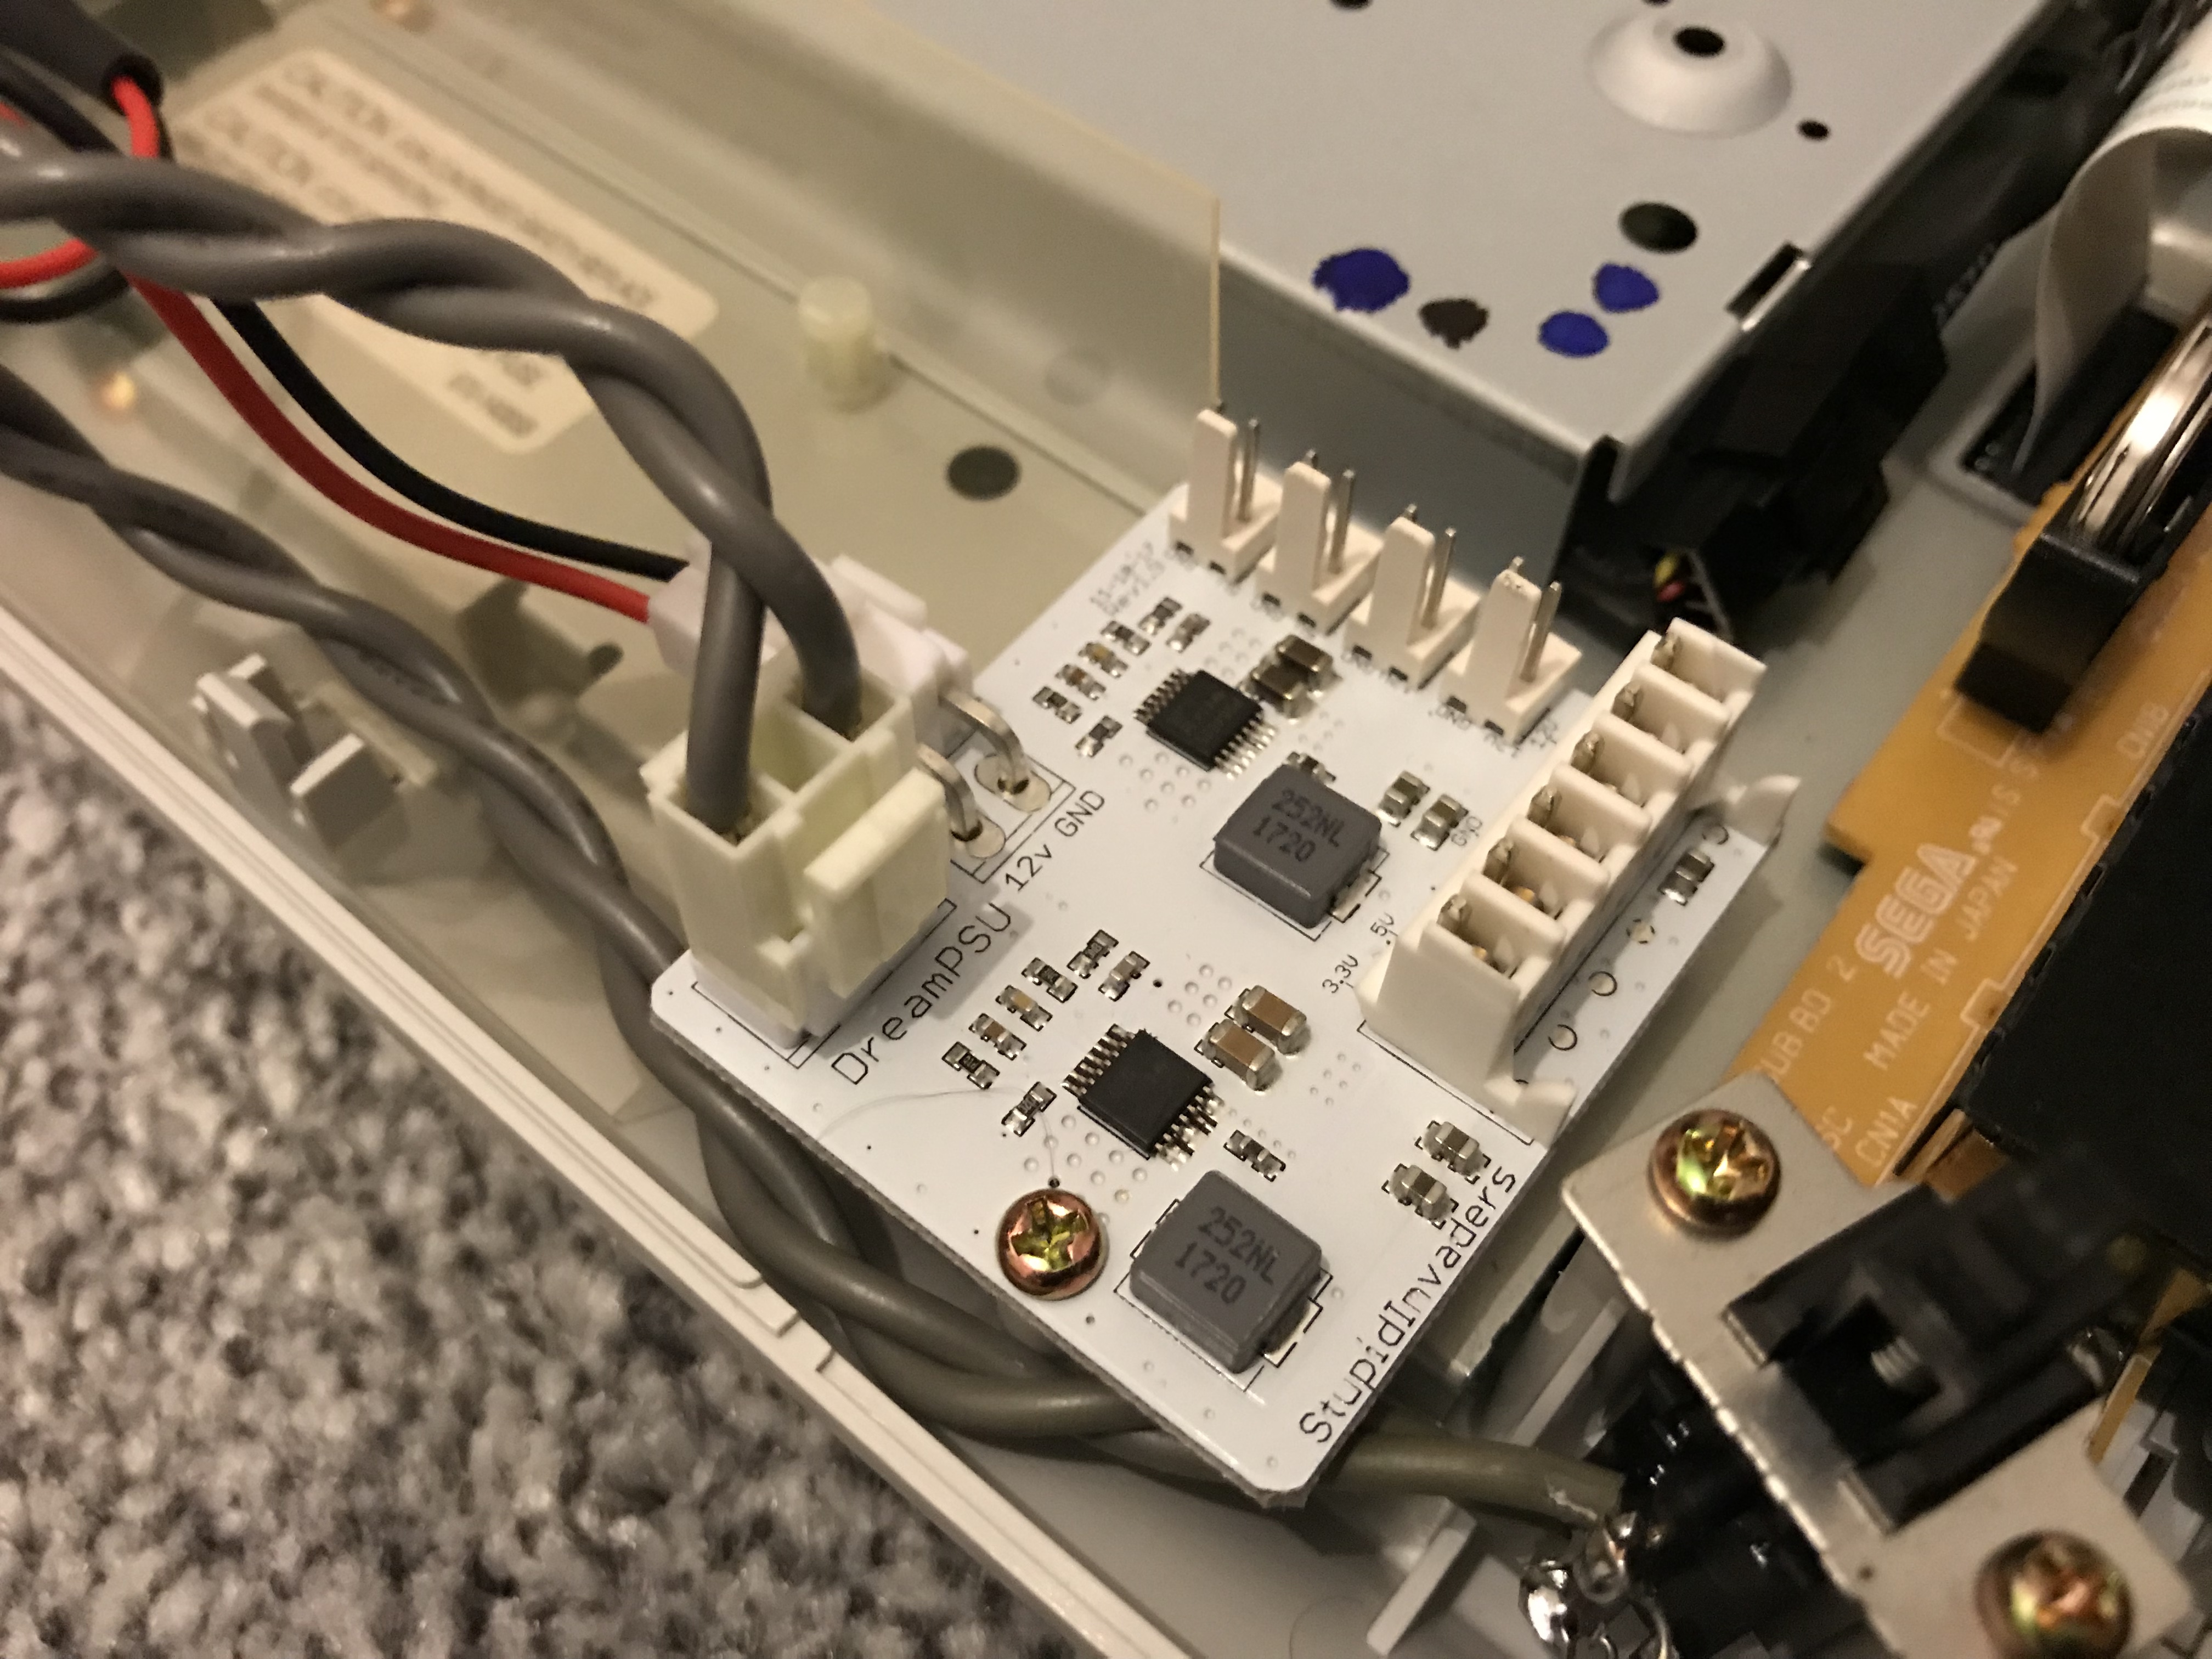
Since the USB GD-ROM requires far less power than the optical drive, the power supply is known to get quite hot after this mod. Some people get around this by adding a resistor which is intended to dissipate some of that leftover power, but this didn’t strike me as a particularly elegant solution.
I subsequently found an Indiegogo campaign for the DreamPSU which replaces the original PSU with something far more suitable. I backed it and subsequently received two units. The DreamPSU keeps the console nice and cool and, since the original PSU is the 2nd most likely component to fail due to age, it should also last a lot longer!
Another benefit of the USB GD-ROM is the complete removal of the noise created by that optical drive. As such, my Dreamcast was now much quieter than an original specification machine but thanks to that incredibly noisy fan on the side, it still wasn’t truly quiet.
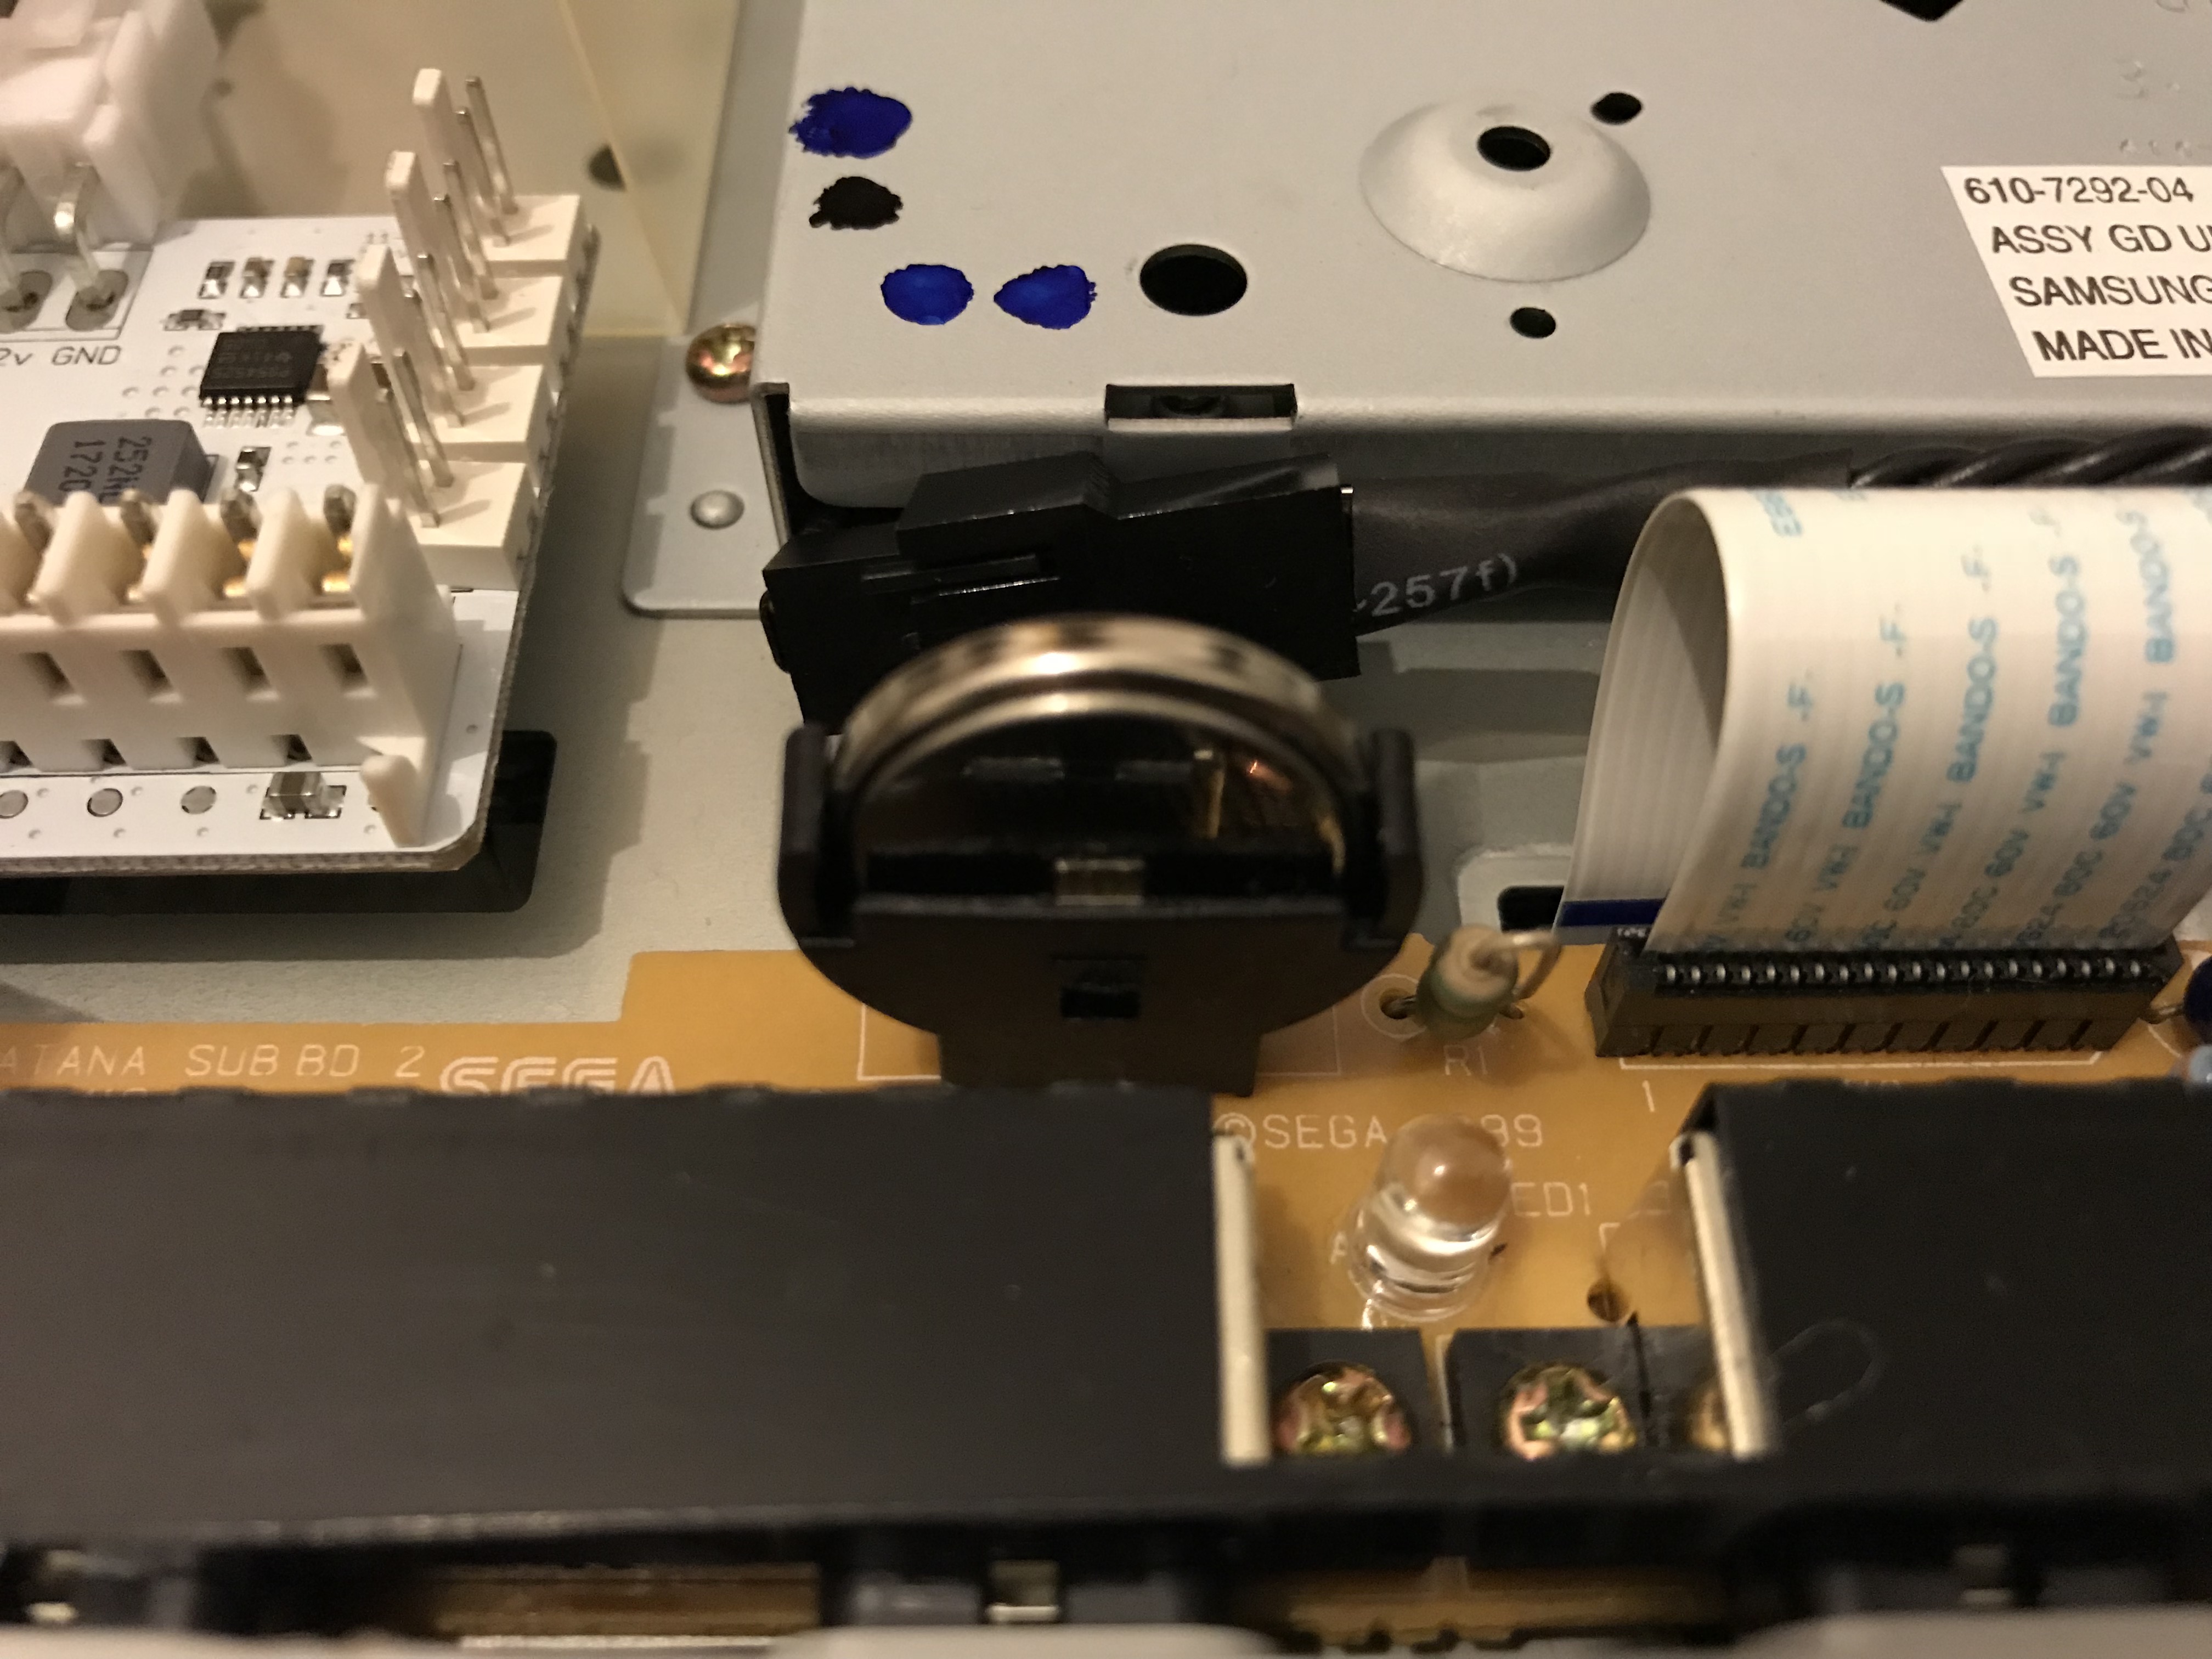
Another annoyance that I wanted to overcome was the dead internal battery. These units are meant to be rechargeable but after 20 years a lot of them have lost the ability to hold a charge. The result is needing to set the internal date and time every time the console is turned on.
Unfortunately the batteries are soldered to the board and cannot be easily replaced, but thankfully there is a solution which is to remove this component entirely and replace it with a battery holder that does allow the battery to be easily replaced.
Update 2nd July 2019
As of now, my Dreamcast also has a DCHDMI installed.
I had previously been using a VGA cable with an OSSC, with phono cables running into the speakers under my TV. The image quality this setup provided was excellent, and until DCHDMI came out, was the best available.
However, the clarity provided by DCHDMI is a noticeable improvement even over the above setup, and the bonus is that I no longer have to setup the OSSC and I no longer have to run phono cables to the speakers. It’s just a single HDMI cable running from the console into the TV, which itself runs through those same speakers by default. And the image quality is amazing!
The Results
So my Dreamcast can now play every game worth playing at the click of a button and it can load those games faster than it ever could before. It’s super quiet, easy to maintain and future-proofed for the next 20 years.
Back in 1998 when I was 16, my father bought me my first Windows computer – a Toshiba Satellite 320CDT laptop from PC World in Chester. It had a 233mhz Pentium MMX CPU, 32MB of RAM and a 4GB HDD with Windows 95 installed.
Although new to Windows, it didn’t take long for me to realise that Windows 95 left a lot to be desired. I upgraded to Windows 98SE at the earliest opportunity and boosted the RAM with an additional 64MB taking it to 96MB in total. For the next few years I used that little laptop extensively and I learned a lot from it.
Tired of BSODs I eventually upgraded again to Windows 2000 which offered a much more stable environment at the notable expense of speed and responsiveness. Eventually it became time to upgrade to a desktop and the Toshiba was handed down to my younger twin sisters who, as it turns out, thoroughly abused it.
I dug out the machine while at my parents’ house a couple of weeks back. I was quite mortified to find the keyboard and screen covered with various bits of food, the modem cable was missing, the track pad nipple was missing, the little door covering the PCMCIA slot was missing and the charger socket was loose which meant the laptop would only charge if you held the cable in at a certain angle. Considering I had always kept the machine in good order I was not impressed. I decided to rescue it in the interest of nostalgia and brought it home with me.
The first thing to do was get all the food stains off it, which was quite easy with some wipes after taking out the keyboard. Next I got onto eBay and found a replacement modem cable, track pad nipple and PCMCIA door. I ordered one of each and then set about fixing the loose charger socket. I doubt I’ll ever use the modem again as I have a wireless network card that will fit this, but it’s better complete than incomplete nonetheless.
After finding a service manual for the laptop (mirrored below) I was all set. I opened it up to discover that the machine had obviously been pulled around by the cable as the solder was cracked and broken on BOTH pins! No wonder charging was so hit-and-miss! A little touch-up with a soldering iron and that too was fixed.
Over the next couple of days the various replacement parts arrived and eventually the laptop was as good as new – apart from the Windows installation which was full of all kinds of freeware/adware/spyware. I decided to reformat and re-install, which was easy as I’ve kept ISOs of all my OS disks over the years.
Interestingly Windows Update no longer works for any browser older than Explorer 6 SP1. As Windows 2000 comes with Explorer 5, I had to find an offline installation executable to manually update that before I was able to download the other 100+ updates required through Windows Update.
After hours and hours of downloading and installing updates I now once again have an as-new Toshiba 320CDT laptop, fully up-to-date (as far as Windows 2000 is concerned at least) and ready to go. It’s too slow to use every day, but as it’s where it all began for me I do feel much better having restored it to its former glory.
If anyone else is restoring a 320CDT, here’s a list of resources and software that might be of interest:
Update 17/2/2014: I’m afraid that I’ve been asked by a representative of Toshiba to remove any links to the company’s websites so you’ll need to use a search engine to find the above downloads page.
Back in the mid-late ’90s, Sega’s 32-bit Saturn was in the process of losing ground to Sony’sPlayStation, mostly due to a series of stupid decisions from Sega themselves. From hurriedly throwing together a machine that was incredibly difficult to program to asking for £400 for it on release (equivalent to between £600 and £707 today), Sega seemed pretty determined to make the Saturn an unattractive proposition for both developers and consumers alike.
As a result of being both difficult to program and the subject of a much smaller user-base, the Saturn was often the recipient of low quality, rushed games that looked (and sometimes played) terribly compared to PlayStation equivalents. Yes, there were obviously a number of greats on the Saturn that, in my opinion, eclipsed much of what the PlayStation had to offer, but I’m not talking about exceptional cases here – I’m talking about the way things were in general.
Sometimes this was down to developers porting over PlayStation code with minimal effort which meant no optimisation (for instance, Acclaim’sAlien Trilogy only used one of the Saturn’s two 32-bit CPUs) and sometimes it was simply down to developers not being skilled enough to get the most out of the hardware.
Sega’s non-existent software libraries meant that writing code in Assembly would yield speed increases of 300-500% over code written in C, but few publishers and developers were willing to spend the time – or the money – to do this. Yu Suzuki himself estimated that only 1% of the industry’s programmers would be skilled enough to get the most out of the Saturn, which compared to the high percentage of developers who could easily get things done on the PlayStation thanks to Sony’s comprehensive C libraries, just wasn’t good enough.
However, while most developers and publishers were happy to release sub-standard crap on the Saturn, there were a few who were willing – or maybe more importantly able – to achieve impressive results on the machine, sometimes even achieving things that were not possible on the PlayStation.
One such company was Lobotomy Software. I remember reading a preview of their first Saturn title, Exhumed, and being overjoyed that finally someone was putting some proper effort into a Saturn FPS. Deadalus, Doom and Alien Trilogy before it had all been horrendous, so I was really looking forward to playing what looked like the console’s first proper FPS game.
I pre-ordered the game and remember being late for school the day it arrived as I had been unable to wait ’til later to try it out. Over the next few months I completed the game several times over and unlocked every single secret, earning the in-game ability to levitate and even fly. The game was just awesome.
On the success of this game (at least technically if not commercially – this was the Saturn after all), Lobotomy Software was commissioned by Sega to also convert Quake and Duke Nukem 3D to the Saturn; both of which also turned out to be favourites of mine.
The brains behind the SlaveDriver engine that powered all three games and put every other Saturn FPS to shame was a guy called Ezra Dreisbach, and although I’d never met him or even seen his photo, I had some serious respect both for him and what he had achieved where so many others had failed.
Back when the Saturn had reached its apex in the US market, I had just obtained a used one and several games and had done some research on USENET for which games I should investigate. Among the games that seemed to be highly acclaimed were three by the company Lobotomy Software. Those titles were all first-person shooters: Quake, Powerslave, and Duke Nukem 3D. The last of these even had the functionality to play over the Sega Netlink modem network device. I bought all three and enjoyed them immensely. As it turns out, I was able to track down Ezra Dreisbach, the lead programmer on Powerslave and actually got to ask questions. Ezra now works at Snowblind Studios where he worked on Baldur’s Gate: Dark Alliance. Here’s the result of that communication.
Matt: You were the lead programmer on Powerslave for the Saturn by Lobotomy, but also on the team for the Saturn ports of Duke Nukem 3D and Quake. Did those all use the same engine?
Ezra: Yeah, they were all based on the Powerslave Saturn engine. It was on the strength of that engine that we were able to get the contract for Duke Nukem and Quake from Sega.
Matt: What were your contributions to that engine? What were your roles on the other games that used it?
Ezra: I was the only programmer on Saturn Powerslave, but after we got the Sega contracts our whole company started working exclusively on those two projects and I moved into more just doing the core game engine work to support them.
Matt: Powerslave and Duke Nukem 3D on the PC both used Ken Silverman’s BUILD engine. Was the engine you designed for the Saturn a port the BUILD engine?
Ezra: Both games were pretty much rebuilt from the ground up. There is no shared code at all.
Those games work very differently from the way that things need to work on the Saturn, so there is really no way to do a port other than to basically remake the game. Doing ports isn’t the most financially or personally rewarding work. So there is no way that we would have wanted to do these if we hadn’t already known how to make Saturn first person shooters.
Matt: What, besides data like textures and models, was carried over from the PC versions? How about porting Quake?
Ezra: For Quake, all the levels were rebuilt by hand using our in house tool “Brew”. For Duke, we had a way to import the level data into Brew, but it still required substantial reworking.
Matt: What kind of system did Brew run on? I presume a PC, but then I’m not aware that I’ve ever heard a Saturn dev kit described before.
Ezra: It ran in Windows. The original idea was that it would be a tool that Lobotomy could use to create first person shooter levels for many games. We used it for Powerslave (Saturn & PlayStation), Mortificator (PC, unreleased) and the Quake and Duke ports.
Matt: You were a member of the “Design Team” for the PlayStation version of Powerslave. Does that mean you were a programmer, or did you fill some other role?
Ezra: No, it doesn’t mean programmer. On a project with so few people, everyone who works on it does some of the design. For instance, I designed some of the boss behaviour.
Matt: How did you feel about the two platforms, Saturn and PlayStation?
Ezra: I did do some work on the PlayStation later. After Saturn Quake was done I did a quick port of it to the PlayStation. Lobotomy was really hurting for cash at that point, and I hoped that we could get some publisher to sign us up to do PlayStation Quake. But for some reason, we couldn’t get anyone to go for it. Lobotomy folded soon after.
Matt: A PlayStation port of Quake? That’s terribly interesting! I’ve wanted a version of Quake on the PlayStation so I could compare versions on all three of the consoles from that “generation”. If you’ve the inclination, I’d truly like to hear how the port turned out on the PlayStation hardware, compared to the Saturn and (if you’ve seen it) the N64 version.
Ezra: The most striking thing about the PlayStation port was how much faster the graphics hardware was than the Saturn. The initial scene after you just start the game is pretty complex. I think it ran 20 fps on the Saturn version. On the PlayStation it ran 30, but the actual rendering part could have been going 60 if the CPU calculations weren’t holding it up. I don’t know if it would have ever been possible to get it to really run 60, but at least there was the potential.
Other than that, it would have looked identical to the Saturn version. Except for some reason the PlayStation video output has better colour than the Saturn’s.
So I know something about the PlayStation. And really, if you couldn’t tell from the games, the PlayStation is way better than the Saturn. It’s way simpler and way faster. There are a lot of things about the Saturn that are totally dumb. Chief among these is that you can’t draw triangles, only quadrilaterals.
Matt: I think I’ve seen an example of this in Tomb Raider on the Saturn. Very early on, in the caves, you can find a rock with a triangular side. In the PlayStation version, a rectangular texture was cut down the diagonal and mapped onto that triangle. In the Saturn version they had mapped the entire rectangular texture into the triangle, reducing one side to a point (in the sense that a triangle is a degenerate quadrilateral with one side of length zero).
Ezra: Ha! That’s pretty weak. What you do if you’re really trying is you pre-undistort the texture so that when you pinch one side down like that you end up getting what you wanted. We had to do this for the monster models in Saturn Quake.
Matt: Do you recall some of the internal differences between the Saturn and PlayStation versions of Powerslave?
Ezra: If you find all the team dolls in the Saturn version, then you get to play Death Tank. I’m not sure what you get in the PlayStation version. Jeff [Blazier] (the programmer of the PlayStation version) was working on a DT-like multiplayer minigame based on asteroids, but I don’t think he put it in the final game.
There are laser wall shooters in the Saturn version, but not in the PlayStation. It was a long time ago. There are plenty of differences, but I don’t remember any more major ones.
You can play a more advanced version of Death Tank if you’ve got Saturn Quake and Saturn Duke. Just boot up Quake so that it makes its save game, then start up Duke and a Death Tank option appears in the main menu.
Matt: Who designed the four exclusive levels for Saturn Quake? And while we’re talking Quake levels, what happened to one of the most memorable secret levels in the original Quake, Ziggurat Vertigo? Was it just too much wide open space for the engine to handle? Or were there other reasons for leaving it out?
Ezra: Yeah, exactly. That level was way too open to run well on the Saturn. One of the main problems with both the Quake and the Duke ports was that, on the Saturn, you can’t just draw a huge flat wall as one huge flat polygon. For one thing there’s no perspective correction, and some other limitations prevent you from even trying to work around that problem by dynamically subdividing the walls. So a flat wall has to be drawn as a mesh of quads. This means that huge walls have to be a lot of polygons, so huge open areas just can’t work. One of the Duke Nukem secret levels had to be replaced for the same reason.
The exclusive secret levels were designed by the whole Quake team. They were actually built by the Quake Saturn level designer, Paul Knutzen, who I’m happy to again be working with on Snowblind’s new project.
“The next part is even more disappointing for the N64 port. Many of you may recall the three switches that light up as you descend a spiral ramp down to a pool of sludge. In the N64 version, the lighting is almost completely static in this section. Apparently adding coloured lighting to sections of the game is easy, but the addition of dramatic dynamic lighting is too hard to do. But wait… Lobotomy managed to pull it off on the Saturn. Crazy.”
I remember being really grumpy about implementing the dynamic-world lights like the three switches in this area. I’m glad someone appreciated it.
Matt: Do you generally like first person shooters? Or was the work on Saturn shooters a business decision, given the popularity of the genre?
Ezra: Yeah, I like first person shooters, Halo was my favourite game last year. But at that point, what I wanted to do didn’t really have anything to do with what Lobotomy decided to do. I was hired to work on Saturn Powerslave, so the decision to do that game was made way before I got there. And even after that I didn’t get much say it what we were going to work on. Not that we had much choice, people weren’t exactly lining up around the block to offer us work.
Matt: What others kinds of games do you play, in your spare time?
Ezra: I’ve already played a ton of games, so I like games that are not ordinary. In the past year, I liked Halo, Rez, Ico and Jet Set Radio Future.
Matt: Porting a game to a platform is said to be far less rewarding than creating a new game, tailored for a specific platform. If you could return to the days of Lobotomy, with the experience you have now, would you have done anything differently?
Ezra: As an independent game developer there’s always a big difference between what you want to do, and what a publisher is willing to fund you for. So usually you end up doing stuff that’s lamer than you’d like. Nothing you can do about it really.
Matt: Any plans for a Death Tank Drei hidden in any of your games?
Ezra: No. I would like to make a stand-alone DT game someday though.
Matt: Thanks for taking the time to share your answers with me. And, as I’ve said before, thanks for the work on Powerslave, Quake, and Duke Nukem 3D… I know I enjoyed playing all three of them.
Yesterday I was reading through my RSS feeds, catching up with the world’s news and this one about the iPhone 4G on Engadget caught my eye.
Engadget had some (slightly blurry) images of what was supposed to be the latest version of Apple’s best-selling iPhone, reportedly found left behind at a bar in a 3G case. The whole article was written in a sceptical tone and an update at the bottom confirmed that the phone was indeed a fake. The update linked to a Twitter page that seemed to be home to several independent sources claiming the phone was a cheap Chinese knock-off.
The tone of the update was pretty bullish because they had apparently been offered time with the phone for $10,000, but had decided not to proceed because they suspected it wasn’t a genuine item. They then took great pleasure in informing the rest of the internet that in their wisdom they had not been fooled by any of it – and that pity should be bestowed upon anyone who had.
Well, what a difference a day makes!
The same phone has now turned up on Gizmodo, and not only do they have lots of hi-res photographs of it but they’ve also examined it inside and out to confirm that yes, it is genuine.
I thought Engadget’s smug proclamation of wisdom and (in this case unfounded) self-belief would look pretty stupid now, so I headed back over there to see how they’d taken the news that they had “done a Decca Records” and passed up the real deal.
I arrived at the site to discover that Engadget had removed ALL references to this phone being a fake and they had rewritten the update at the bottom of the page to say that the phone looked like a Chinese knock-off, but the smug statements were gone.
Not only that, but on another post dated the day after, Engadget declared, “Well, we told you so. The fourth-generation iPhone prototype that leaked its way out into the world over the weekend has found its way to Gizmodo, and they’ve examined it exhaustively, erasing any doubt that it’s real.”