Having recently secured a dedicated games room after moving house, I’ve been slowly working my way through each retro console and making it the best that it can be before adding it to my custom-made TV cabinet. First on the list was the Sega Dreamcast.
The first thing to do was replace the optical drive (inherently one of the parts most prone to failure on retro hardware) with a USB GD-ROM. This board physically replaces the drive with a USB port allowing the user to run their games from USB stick. Games load faster, the console is more reliable (and a lot quieter!), and depending on the size of the USB stick, the owner need never get up from the sofa again when switching games!
When researching this component I come across a fair amount of negative feedback on “Mnemo”, the guy who makes them, including the notice on this page (since removed so check out this page instead).
By all accounts, the guy seems to be a bit of an arsehole challenge to work with. Nevertheless, the USB GD-ROM is a great piece of kit, he seems to be the only person on this earth who makes them and they hardly ever seem to come up for sale second hand, so if I wanted one I was going to have to buy direct from this guy.
Thankfully I found feedback from many users who had done just that and they had all received their units as promised so I took the plunge. And I’m pleased to report that a few weeks later, it arrived!
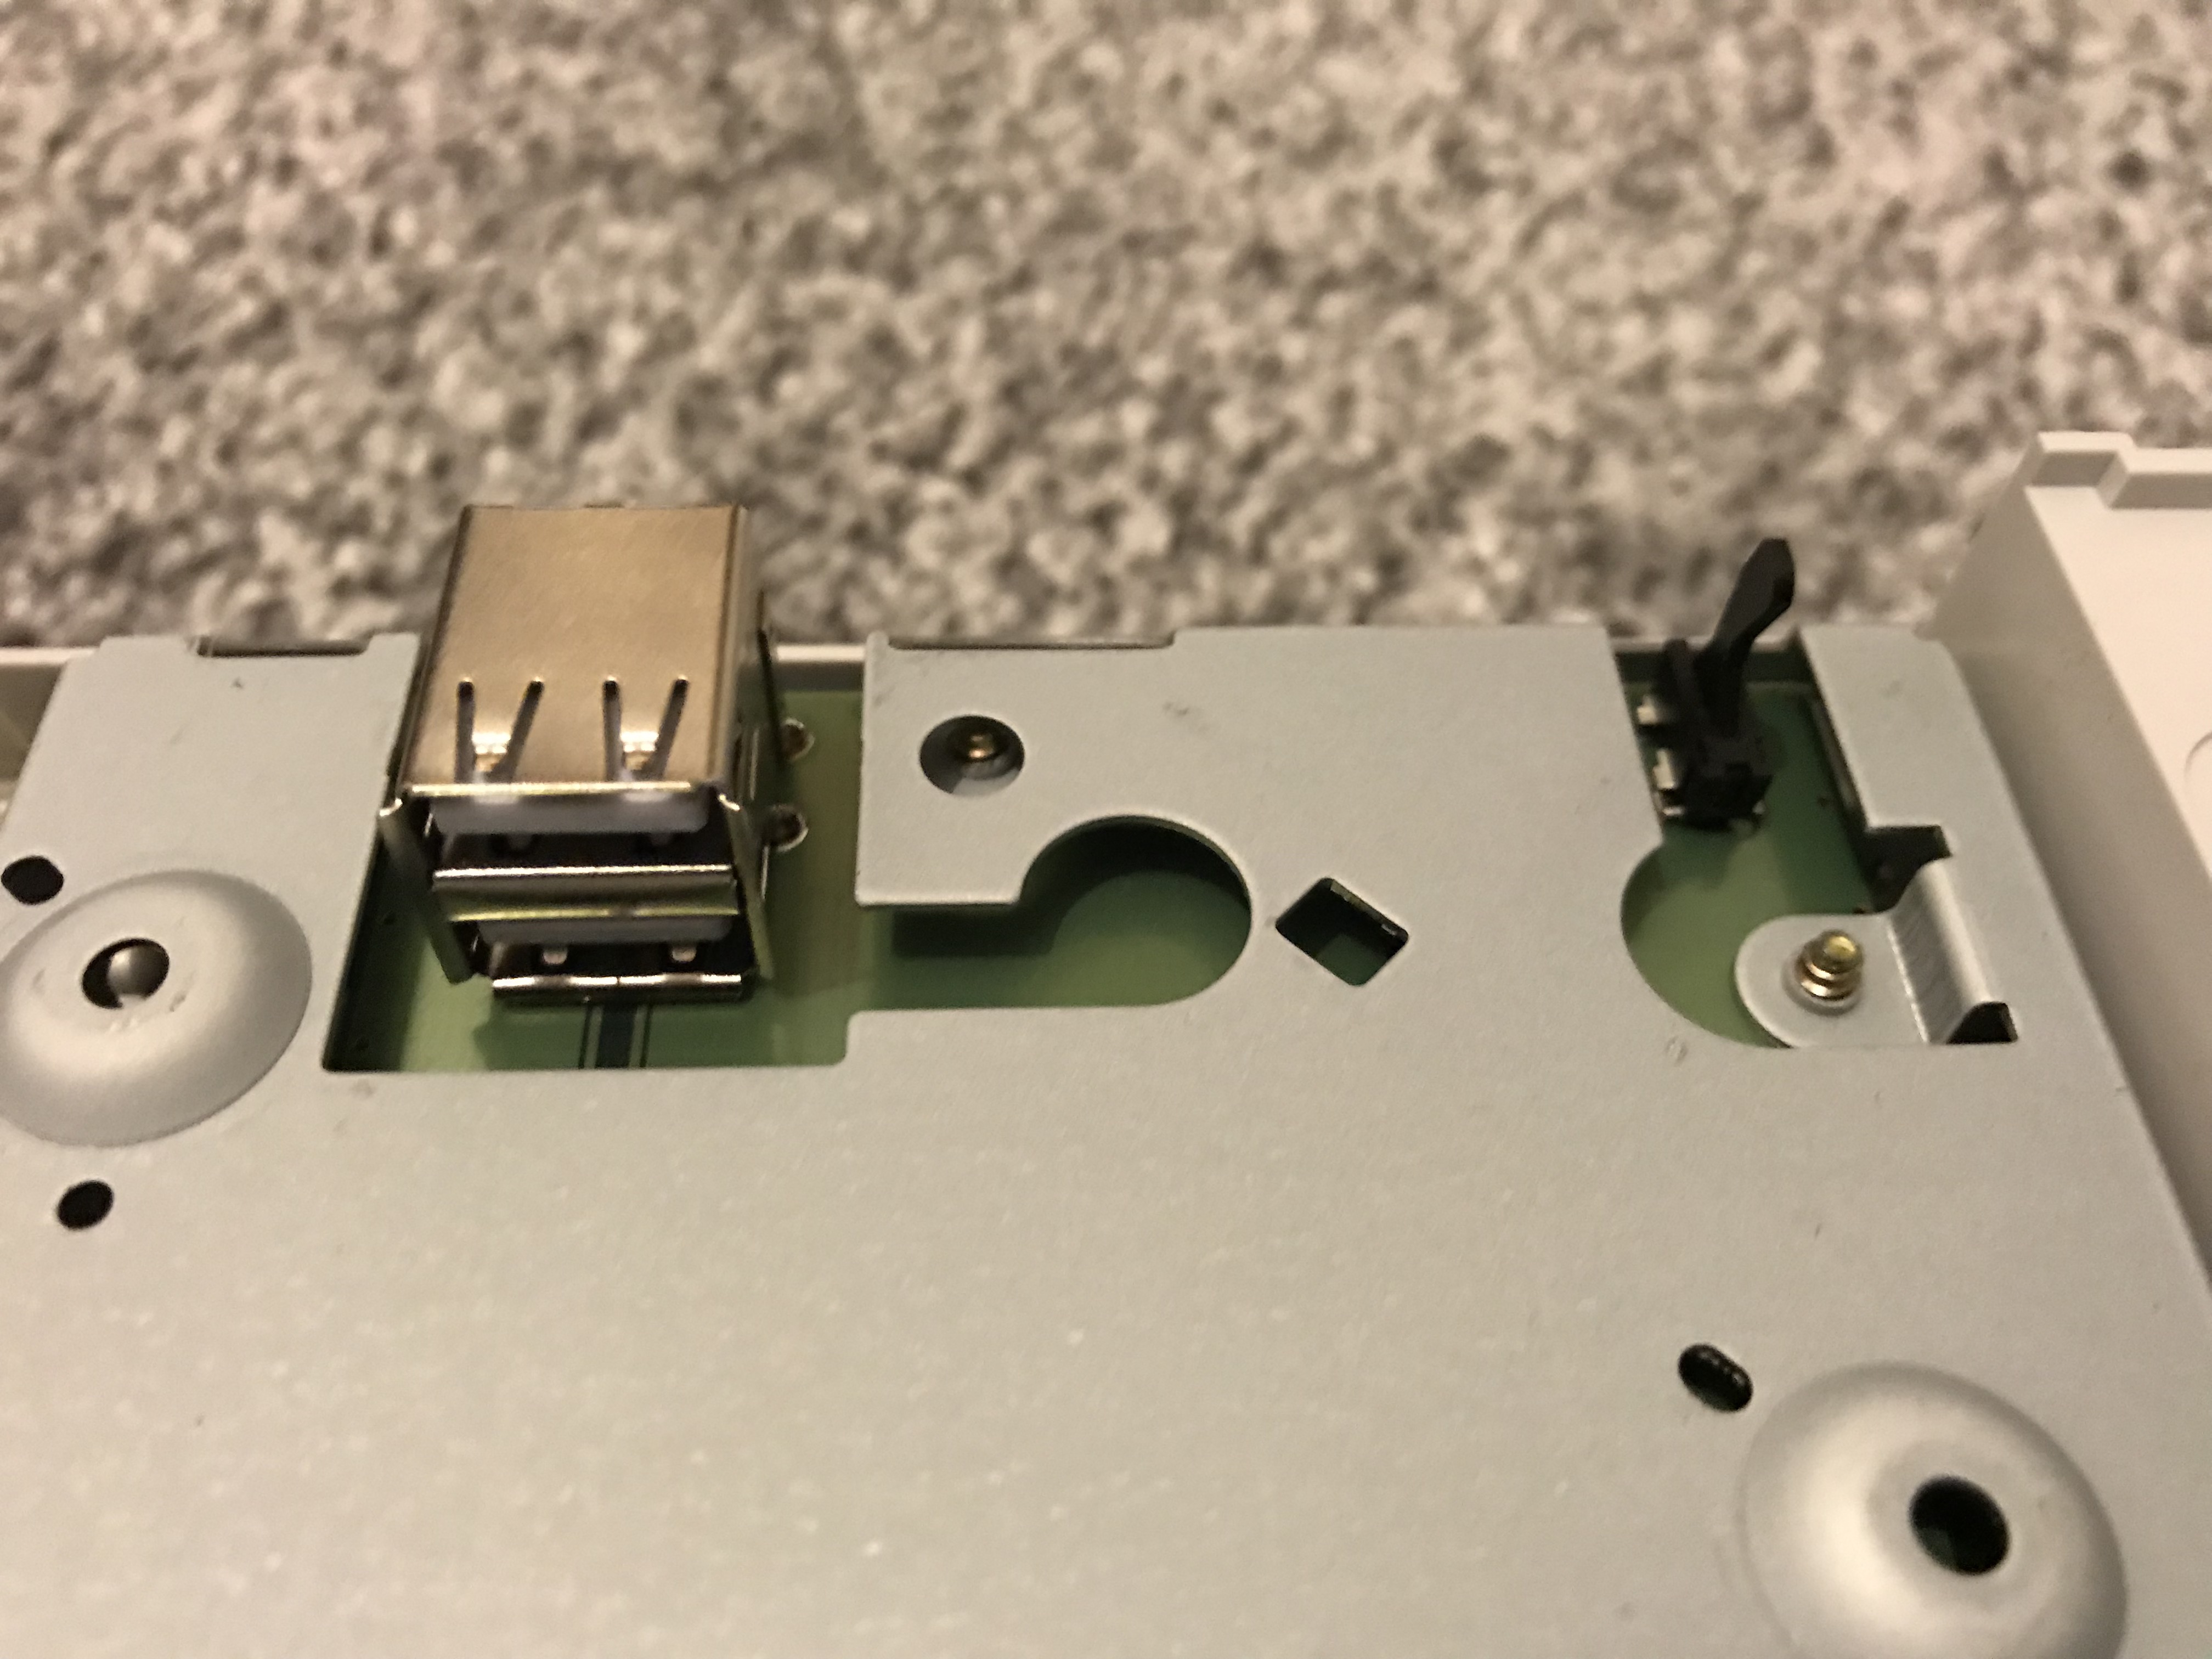
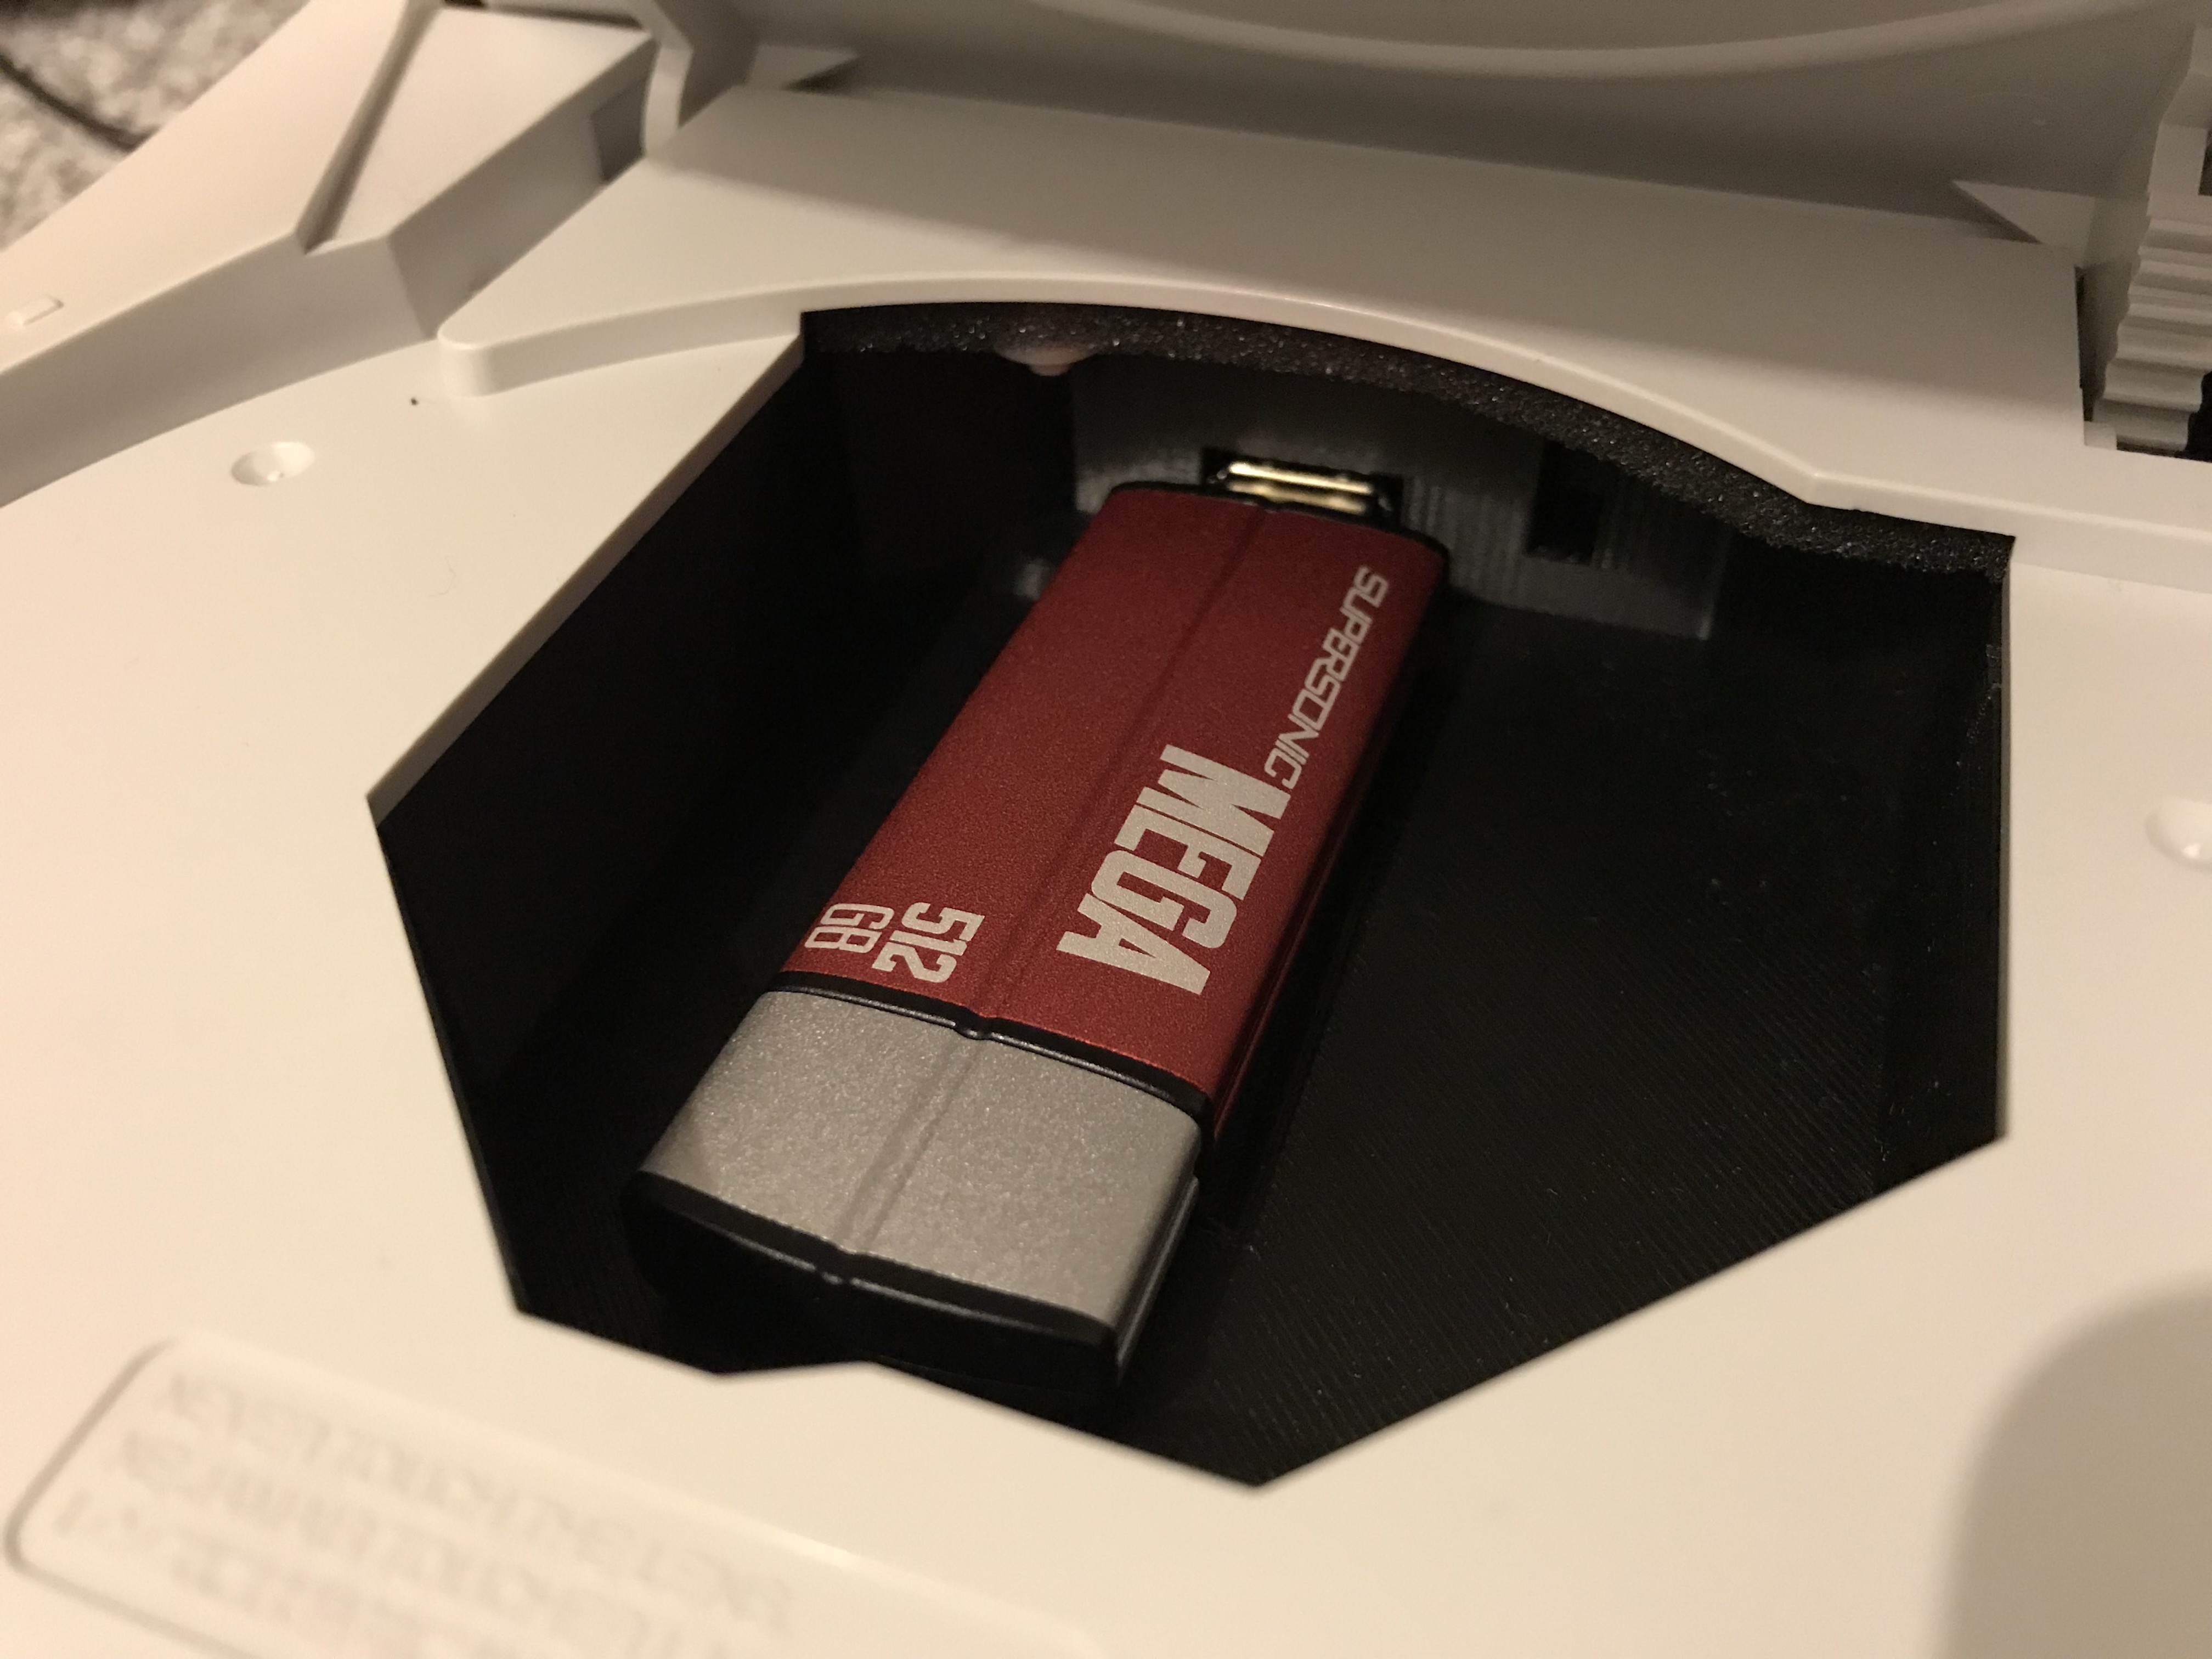
For a lot of people, this is as far as Dreamcast modding goes. But I didn’t like the fact that the board was visible through the hole inside the drive bay where the optical drive had once sat, so I ordered a 3D-printed plate that hides everything very neatly.
A Patriot 512GB Supersonic Mega USB 3.0 drive completed the mod, allowing for the majority of the Dreamcast library – and certainly every 70%-and-over game – to be accessible without ever having to open the drive bay again.
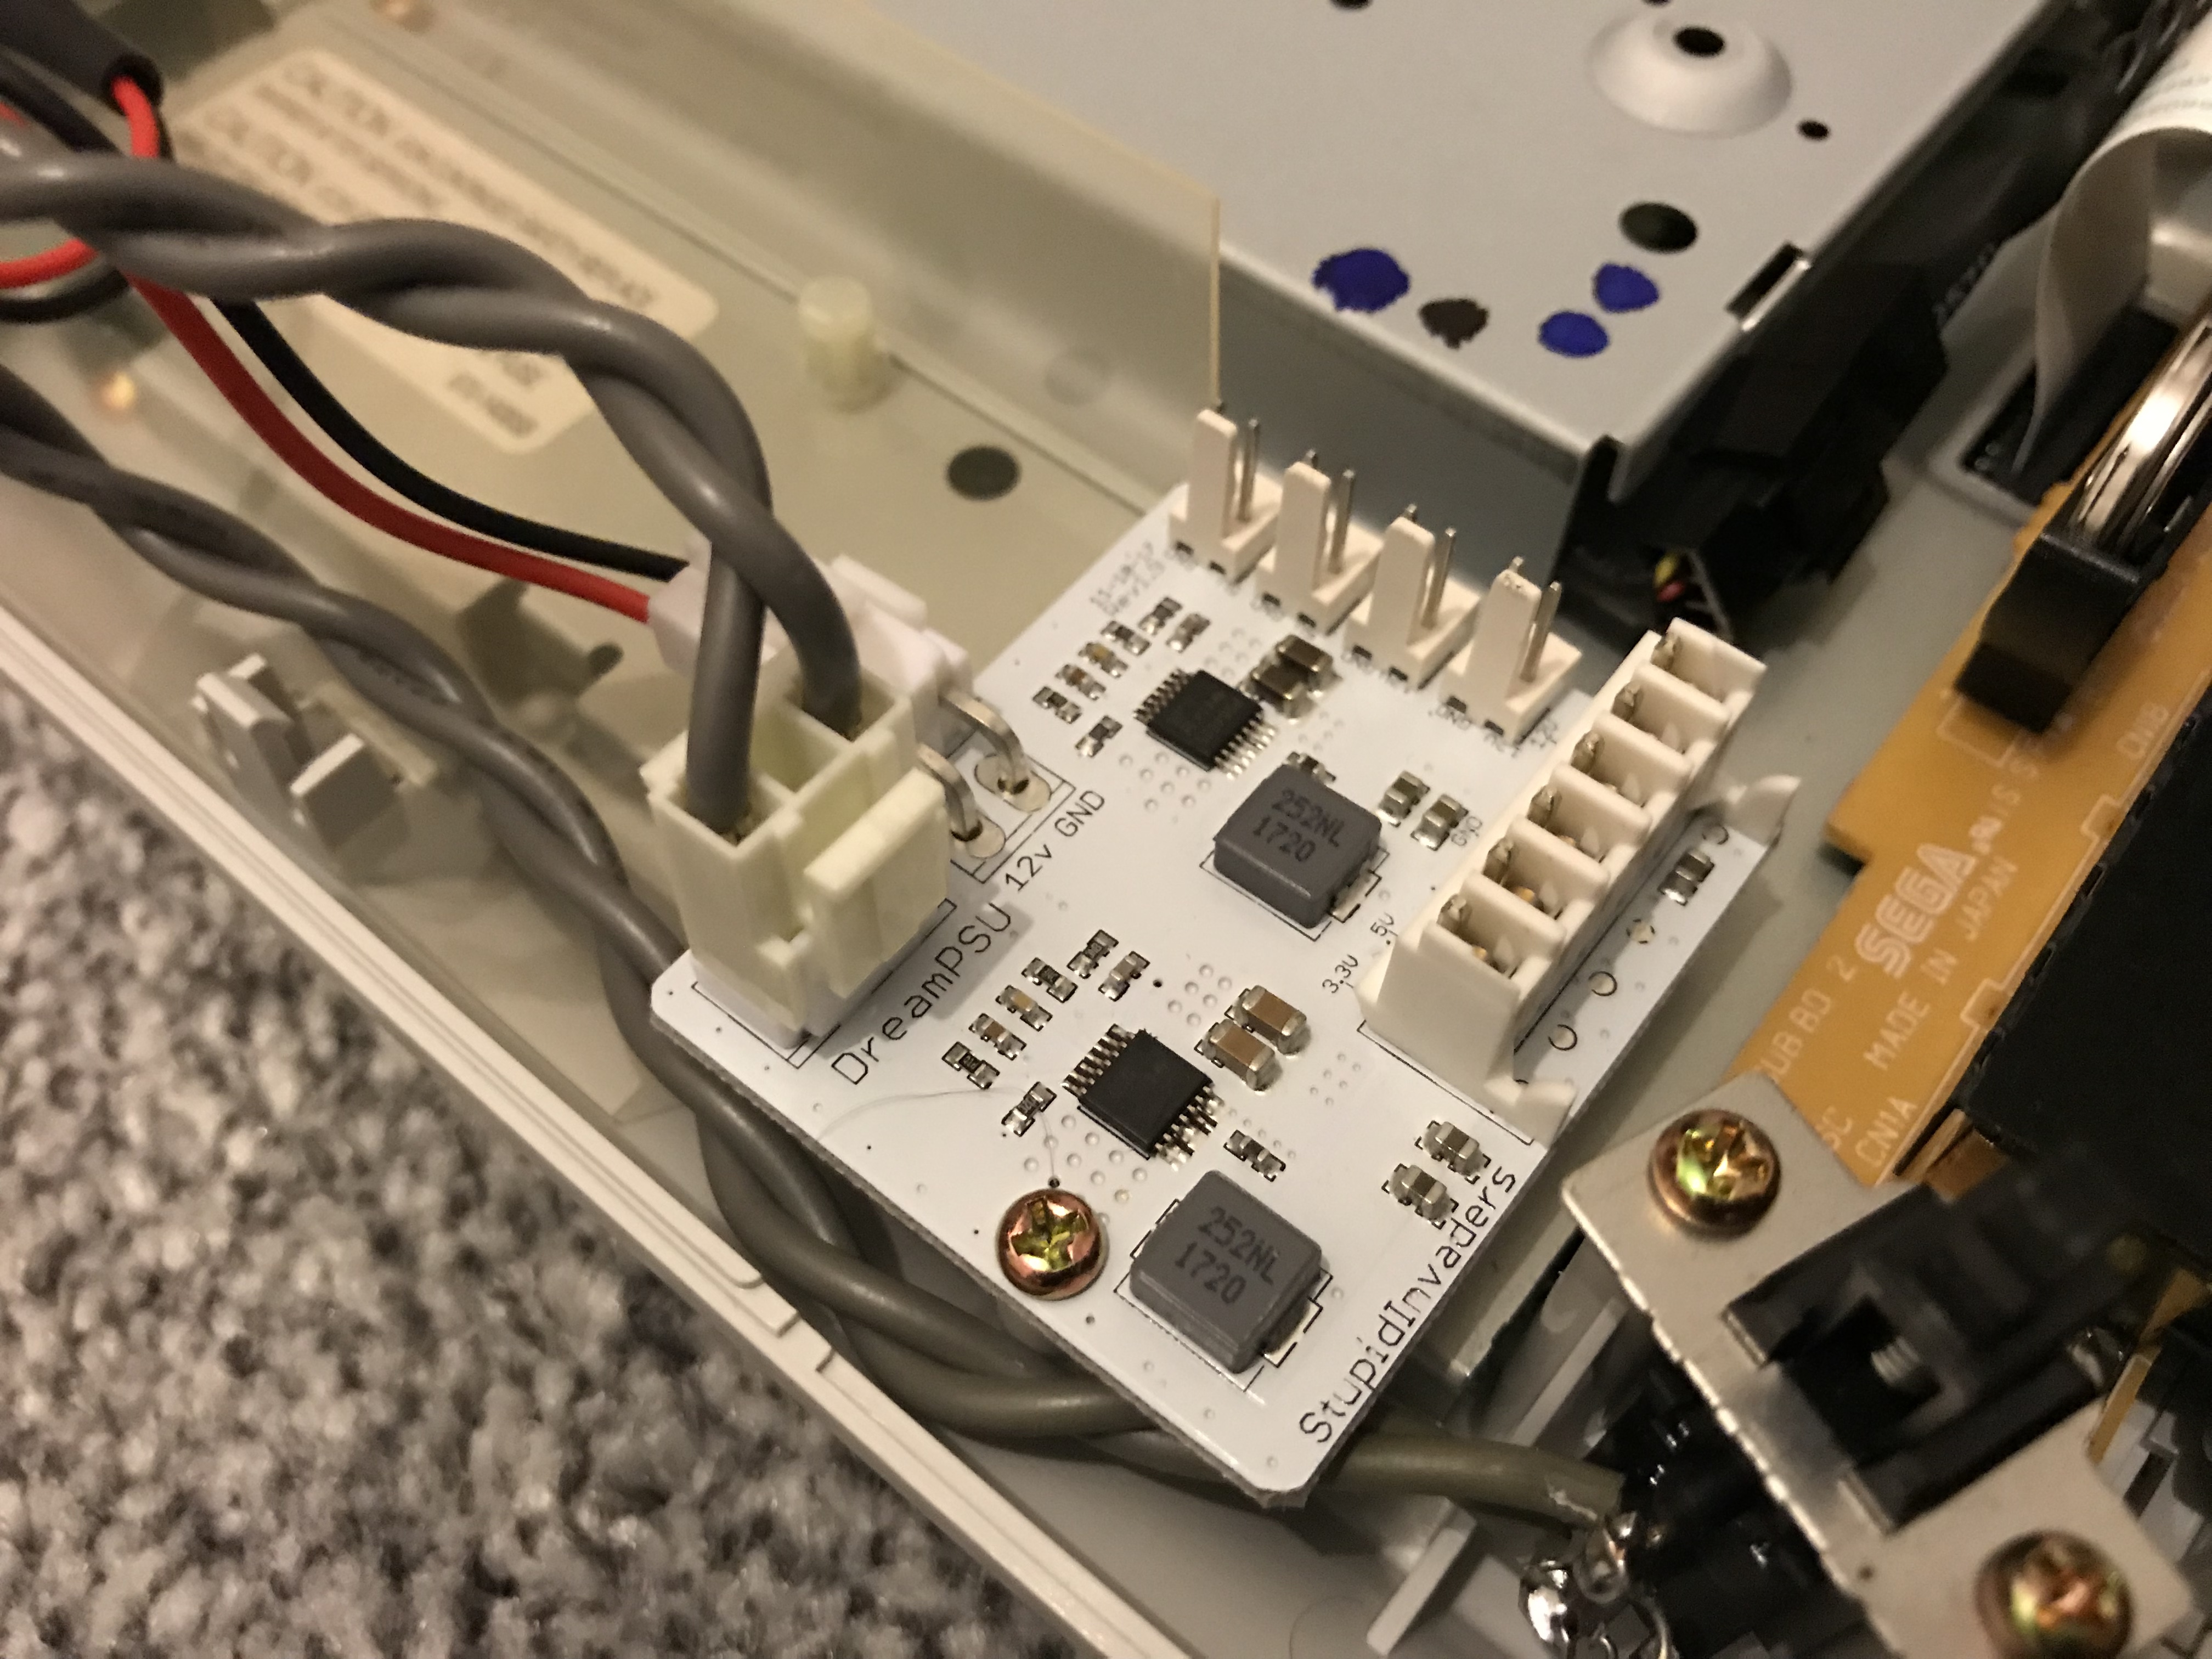
Since the USB GD-ROM requires far less power than the optical drive, the power supply is known to get quite hot after this mod. Some people get around this by adding a resistor which is intended to dissipate some of that leftover power, but this didn’t strike me as a particularly elegant solution.
I subsequently found an Indiegogo campaign for the DreamPSU which replaces the original PSU with something far more suitable. I backed it and subsequently received two units. The DreamPSU keeps the console nice and cool and, since the original PSU is the 2nd most likely component to fail due to age, it should also last a lot longer!
Another benefit of the USB GD-ROM is the complete removal of the noise created by that optical drive. As such, my Dreamcast was now much quieter than an original specification machine but thanks to that incredibly noisy fan on the side, it still wasn’t truly quiet.
I remedied this by installing a Noctua NF-A4X10-FLX 5V fan with the Dreamcast Noctua fan mod kit. The result is that the console is now almost completely silent when running.

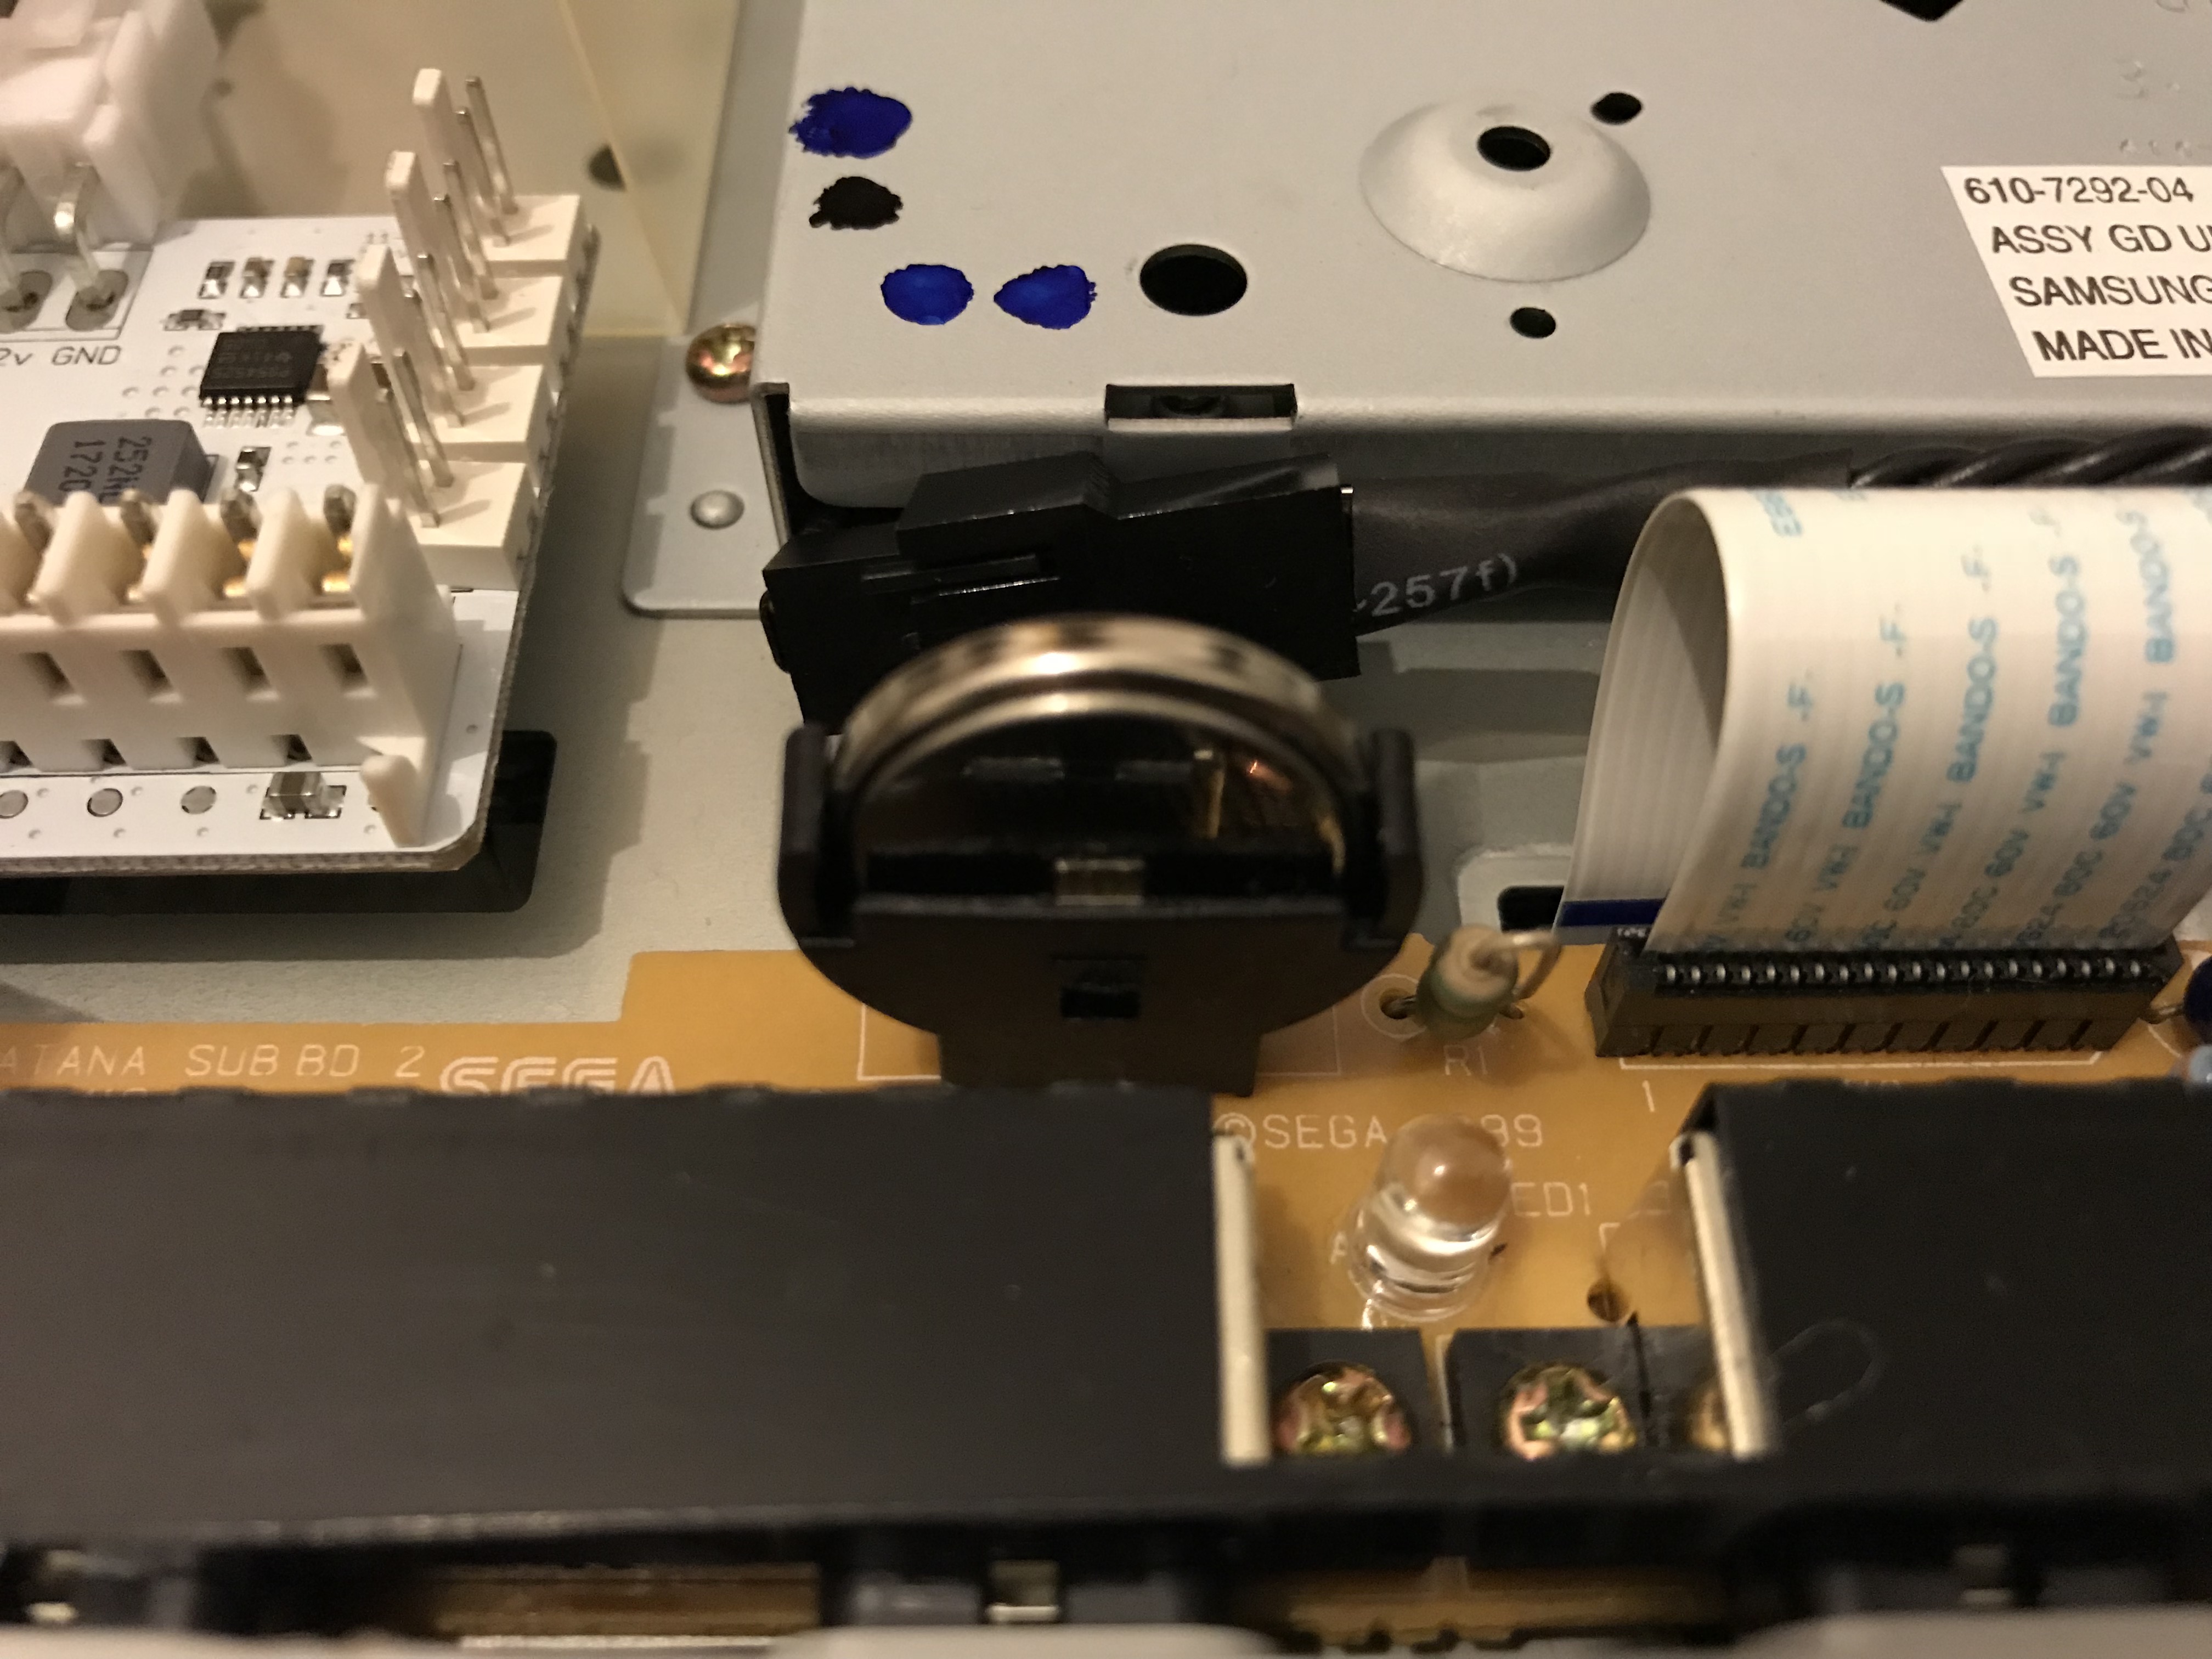
Another annoyance that I wanted to overcome was the dead internal battery. These units are meant to be rechargeable but after 20 years a lot of them have lost the ability to hold a charge. The result is needing to set the internal date and time every time the console is turned on.
Unfortunately the batteries are soldered to the board and cannot be easily replaced, but thankfully there is a solution which is to remove this component entirely and replace it with a battery holder that does allow the battery to be easily replaced.
Update 2nd July 2019
As of now, my Dreamcast also has a DCHDMI installed.
I had previously been using a VGA cable with an OSSC, with phono cables running into the speakers under my TV. The image quality this setup provided was excellent, and until DCHDMI came out, was the best available.
However, the clarity provided by DCHDMI is a noticeable improvement even over the above setup, and the bonus is that I no longer have to setup the OSSC and I no longer have to run phono cables to the speakers. It’s just a single HDMI cable running from the console into the TV, which itself runs through those same speakers by default. And the image quality is amazing!
The Results
So my Dreamcast can now play every game worth playing at the click of a button and it can load those games faster than it ever could before. It’s super quiet, easy to maintain and future-proofed for the next 20 years.
I’m very happy with how it’s turned out!
Nice summary of the best Dreamcast mods Gareth! I am working my way through your list 🙂 FYI the DreamPSU is now here: http://www.retropsu.com/store/product/dreampsu/
Thanks, Mike! How’s your Dreamcast doing now?
Hi. Excellent job; can you elaborate on the battery mod though? Where’d you get the battery holder from, what was involved to fit it, etc?
Hi Wayne
I got the board pre-modded from ebay. I can’t find any such items on there at the moment but there are plenty of standalone holders which you could buy if you’re happy to perform the mod yourself: see here.
It was all pretty straightforward – just undo some screws, unplug a cable, remove the board and then do everything in reverse to put the new one in. If you do end up buying a standalone holder though then obviously the process will be a little different as you’ll be re-using your existing board after doing a spot of soldering.
Thanks Gareth,
I’m inspired by your list of mods; my Dreamcast has been long neglected, but got a GDROM and plastic tray on-order and potentially in the market for other mods. Wondering if the external power supply is still needed once the fan mod and plastic tray is installed (as I think both will help with the internal temperature)?
I’ll look into the battery parts now though, thanks!